
In this video, I will show you how make your Ender 3 print silent (less noisy) with the new Creality Mainboard 1.1.5.
Read the blog-post below for a text version.
Hello, my name is Daniel, welcome to the CrossLink blog. I would like to help you being more successful with 3d printing and if you're here for the first time, subscribe to my YouTube channel and hit the bell notification icon so you don't miss anything.
Everyone who owns a 3D printer knows that cheap printers can be quite noisy for various reasons. One might be because of the fan noise a 3D printer generates during printing, the other one might be the motor drivers on those mainboards be it either Anet or Creality or others, most of them are still using A4988 drivers because they are super cheap.
Of course you can find solutions for defective or loud fans and get better replacements, but you will still be left with the loud stepper drivers, so how do we fix this issue without too much tinkering and a lot of headaches?
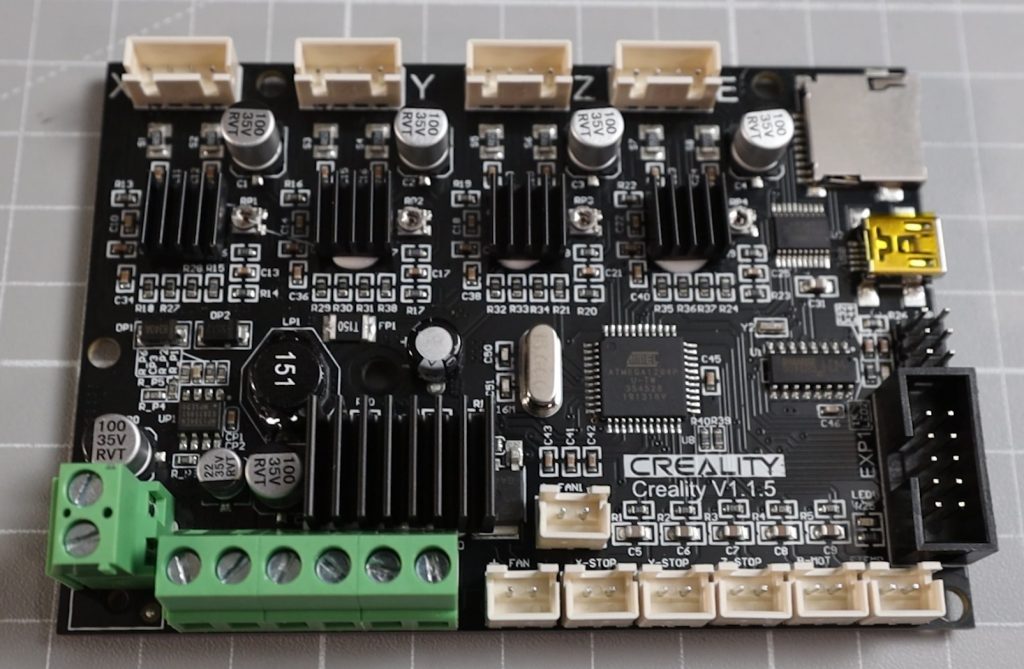
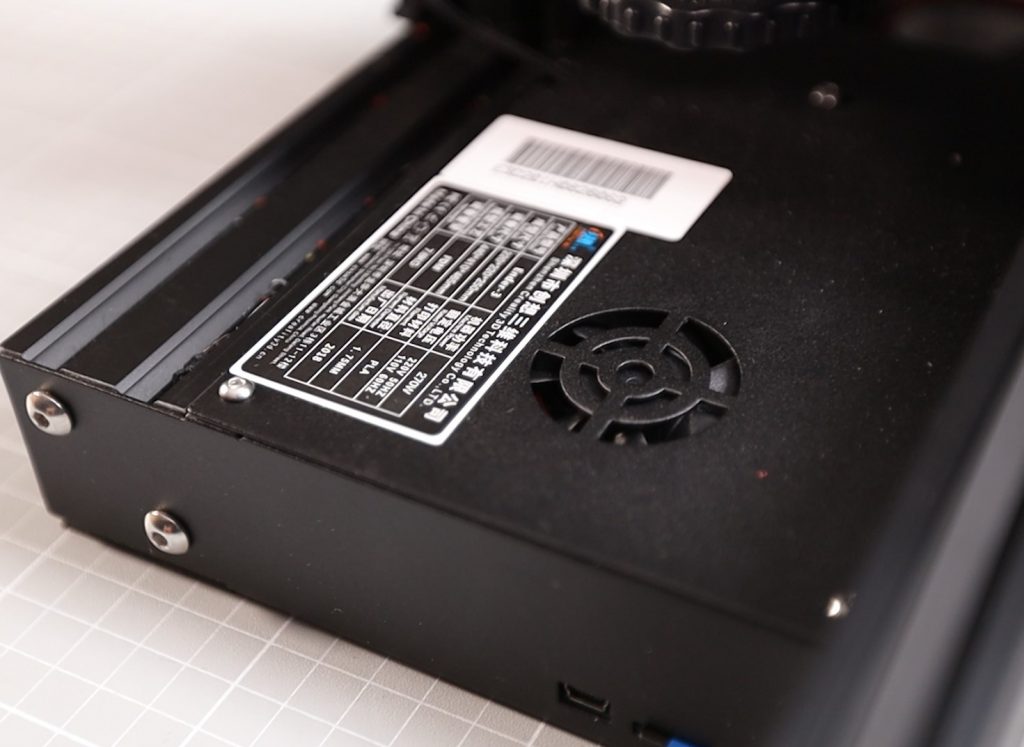
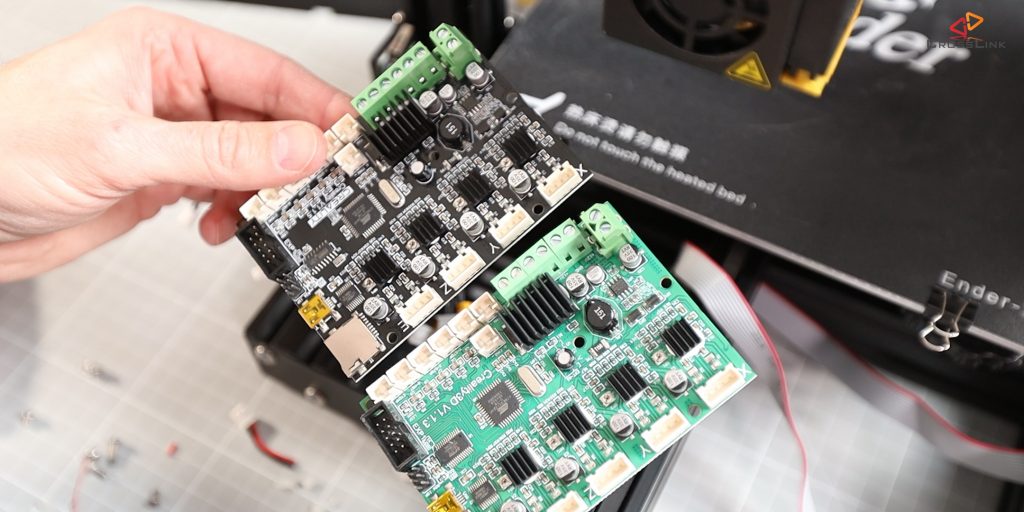
The answer is - we're going to install this brand new Creality mainboard 1.1.5 for the Ender 3, which has TMC2208 silent stepper drivers. And since it's coming directly from the Manufacturer, you can expect that it will fit perfectly for this printer and all it's cables and connectors. This should be a simple swap out upgrade. I am also giving away one of these mainboards for free. If you like to enter the giveaway, use the link crosslink.io/free to enter.
Technically, the only difference between this version and the original one in this printer are the stepper drivers. The original mainboard has A4988 stepper drivers, which are known to produce a lot of stepper driver motor noise because they only support 16 microsteps vs. 256 microsteps supported by the TMC2208 drivers on this new mainboard. (read more about microstepping here)
The thing about more microsteps that you will appreciate most is that TMC2208 drivers are controlling the motors in a way that produces at lot less noise. This is the unique selling point of the TMC2208 drivers, that feature is also called StealthChop.
To be able to compare the noise levels of the printer running on the old setup vs. the new setup, I am monitoring a print of a benchy using a calibrated noise meter.


I've let the measurement run for about 20 minutes, let's have a look at the first result.
I've exported the measured sound level curves into an Excel Spreadsheed and created a Linechart to visualize the values over time. Let's first have a look at the original setup without fan covers.
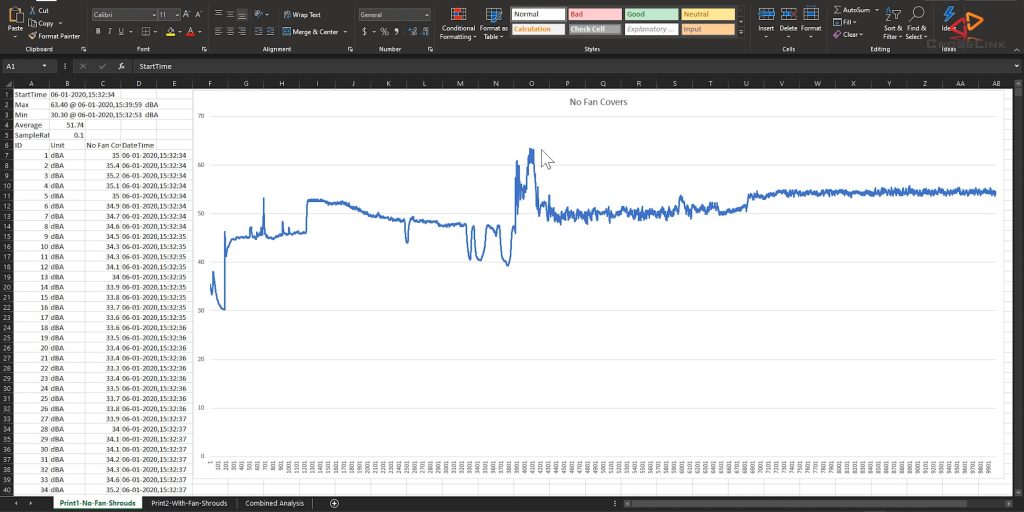
You can see in the screenshot (hover to zoom), that we have an initial idle sound level of 45dba after the printer has been turned on.
During the warmup phase, the levels go up to a max of about 52dba and then the peak noise of 63dba is reached during the homing phase.
During the first layer print, the average level is about 50dba and during the following layers, it raises to an average of 55dba.
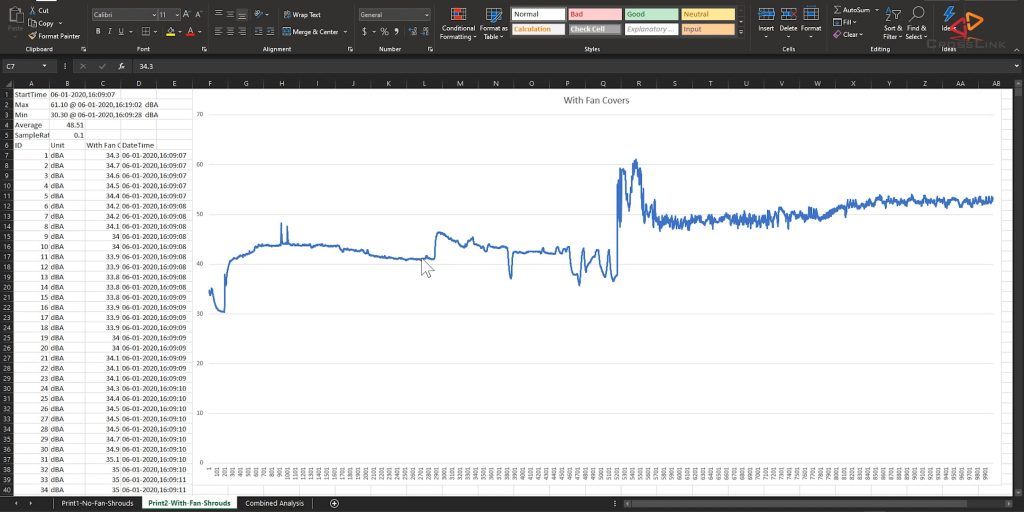
In the second test print with fan covers, the initial idle sound level is about 41dba, the warmup phase maxes at 46dba and during the printing phase, the first layer generates around 48.5dba on average, the following layers are 52.5dba on average.
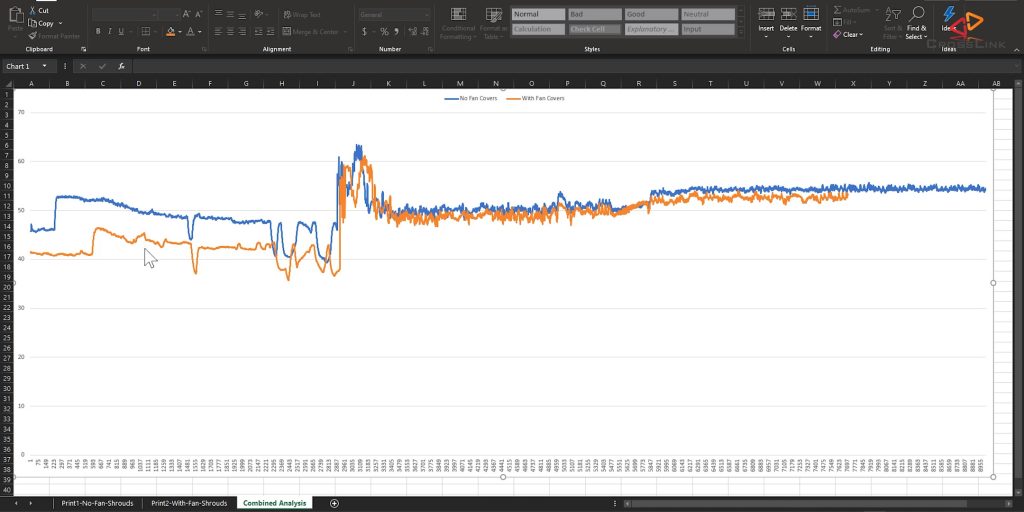
If we overlay both curves, we can see that on average, the noise levels with fan covers are lower than without fan covers. The difference during the warmup phase is the most prominent, the absolute difference there is 6dba. 6dba difference is pretty hefty. Some people will perceive 6dba about as almost "double" the noise level. I can definitely recommend printing these upgrades, I've linked both files in the description down below.
So, now that we know the sound levels of the original printer setup without and with fan covers, let's talk a bit about what we need to change on the Ender 3 to get consistent print results with the new mainboard and stepper drivers.
A downside of the TMC2208 drivers is that they get a lot hotter during printing, so they need to be cooled properly, which gets us to the problem - the way how the mainboard cooling fan of this printer is operated by default
Original mainboard cooling fan 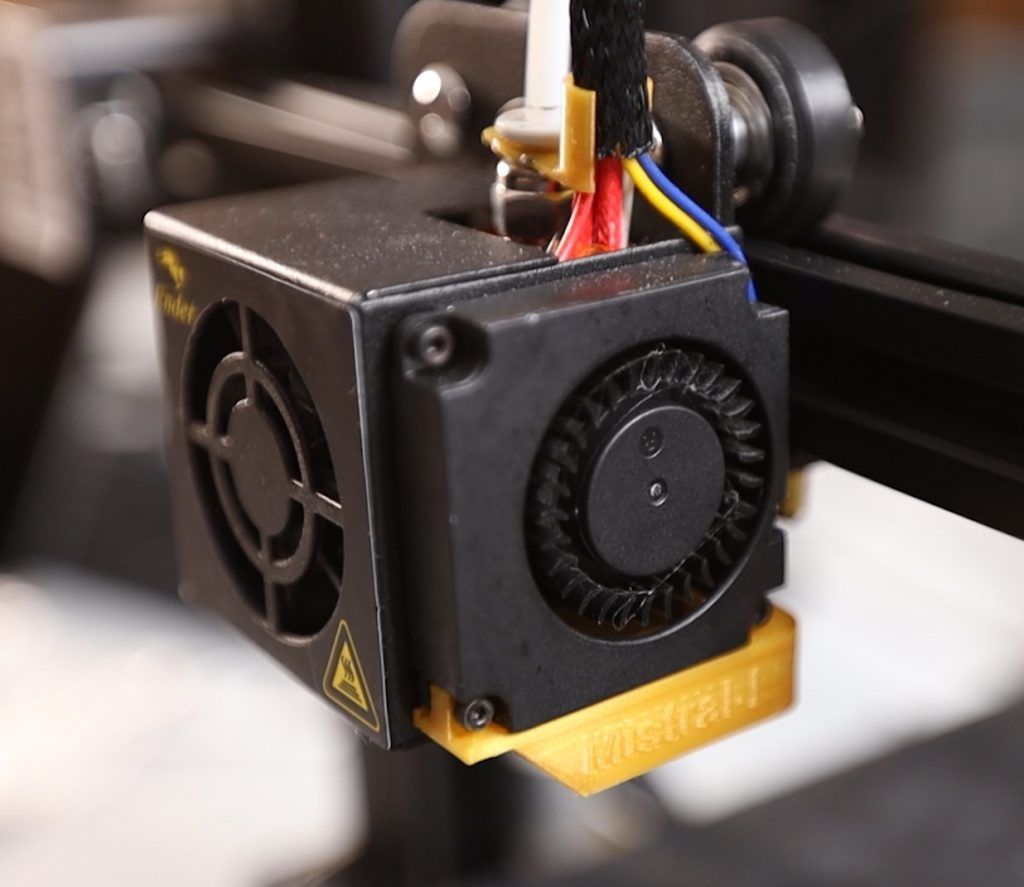
Parts cooling fan
The cooling fan of the ender 3 mainboard case is connected to the parts cooling fan of the hotend. This means, it will not start running until the parts cooling fan starts to run. If you decide to turn down the amount of cooling you want for a print, let's say to 60%, the electronics case fan also is just going to run on 60%.
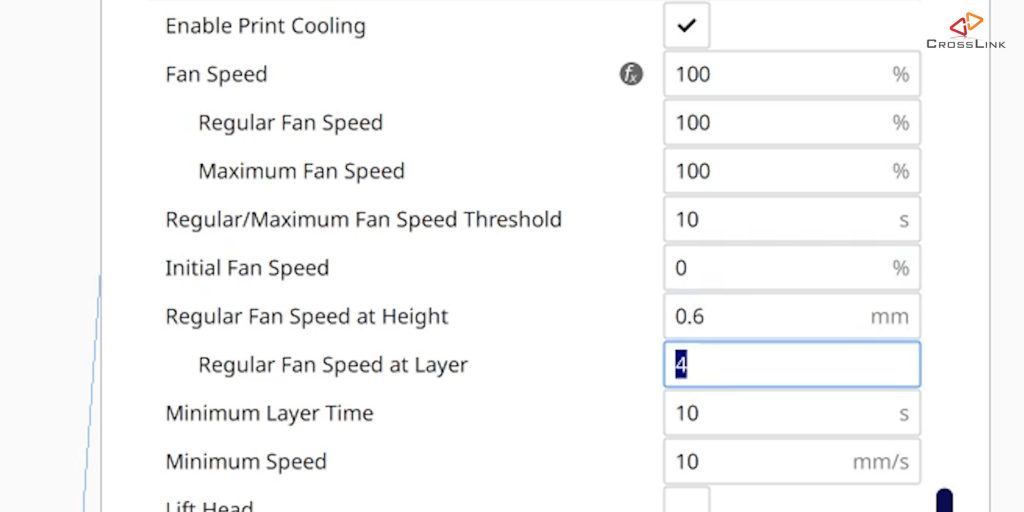
If you disable cooling for the first layer, which is a common setting in most slicers, the mainboard will not get cooled until the parts fan starts running at the 2nd or 3rd layer and some slicers increase the cooling gradually from the 2nd layer on, which means the mainboard cooling fan might not be running at full speed until a few layers have been printed.
This will induce issues with layer skipping or extrusion issues because the stepper drivers get hot quickly and might fail, so they need to be cooled from the first moment the printer starts printing.
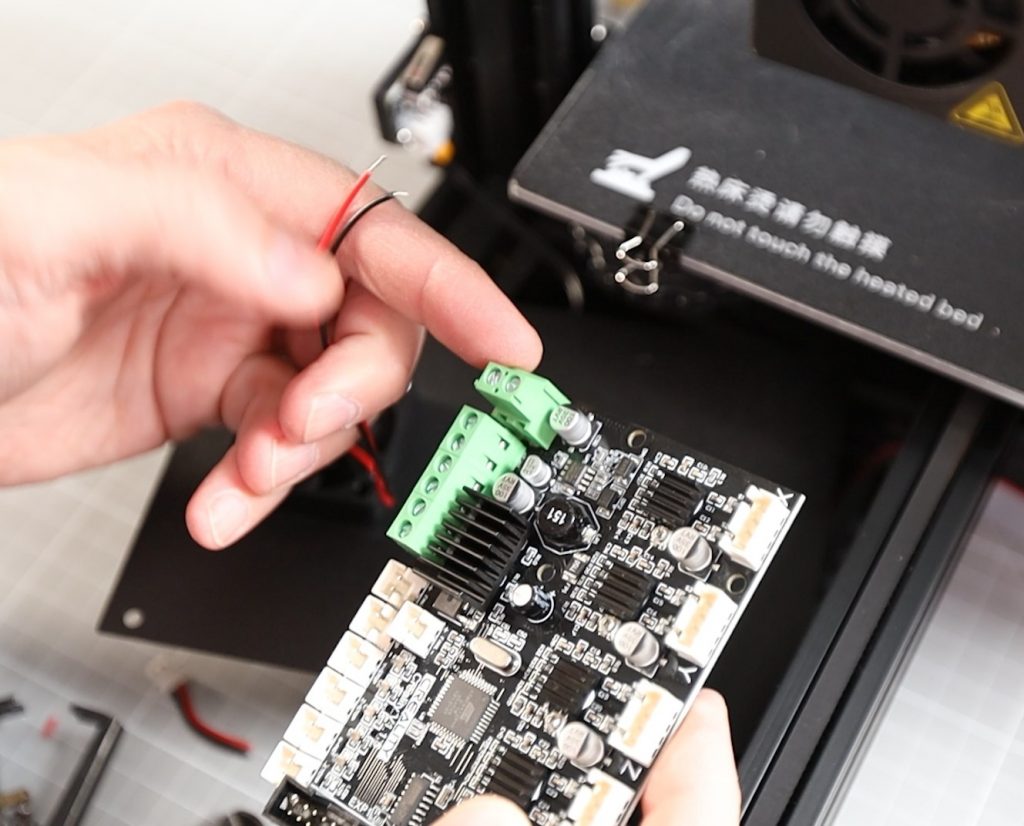
To fix this, we will connect the mainboard case fan directly to the power supply, so it starts running as soon as the printer is turned on. And I would say, this is also not the worst idea anyways, also for the stock mainboard. Besides that little change, the new mainboard is really just a drop in replacement, .
Don't forget to remove the main power before you start tinkering with the power cables, just to be safe.
Now, you take every cable plugged into the old mainboard and plug it into the same slot on the new mainboard. The same applies for the power, heatbed and hotend cables, which are fixed using power terminals on the mainboard.
Let's now start to print a first benchy to see and hear, how the new mainboard performs and reduces noise levels on the ender 3. (Watch the video to hear the difference)
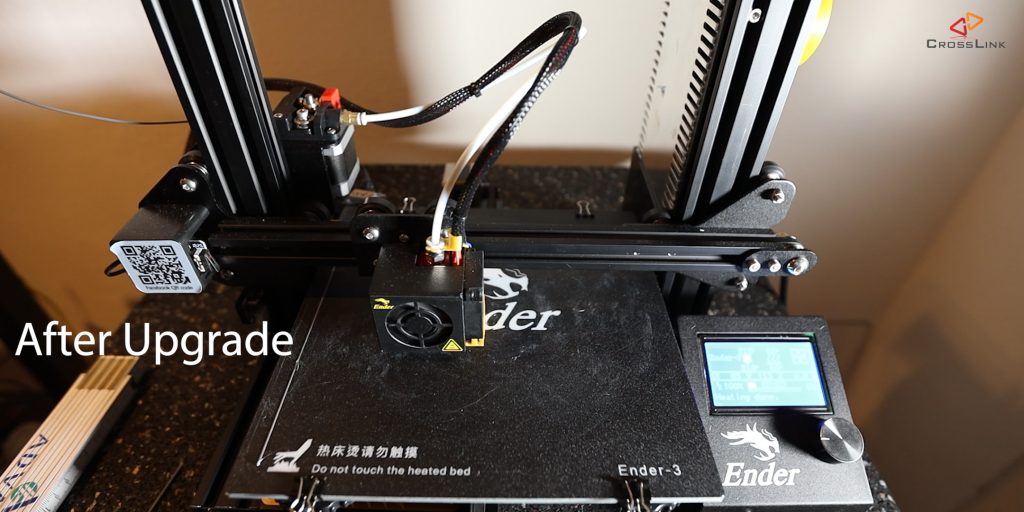
Just by my personal perception, I would say, the motor noise is almost gone completely and the printer sound overall is much more pleasing to your ears.
The loudest part left on this printer are the fans, but let's have a look at the final sound levels, which I overlayed on the original two measurements with the old mainboard.
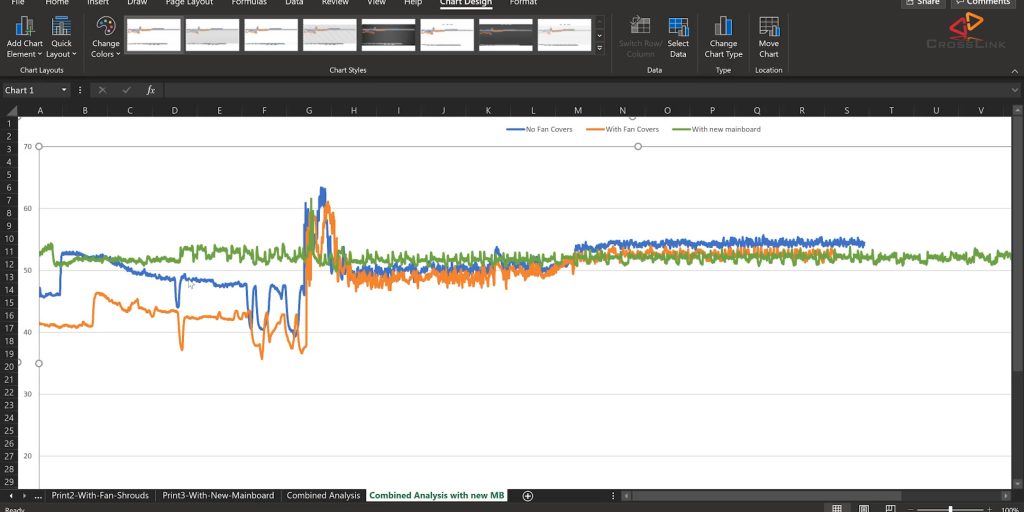
The curve after the mainboard upgrade is the green one.
So, it looks like the noise levels are pretty much a flat line at 52dba. And this is the same level as the long term print noise on the original setup.
The homing noise besides the little peak, when the heatbed hits the endstop switch is reduced a lot. So the effect on the motor noise is very visible.
Why is the base noise level higher than before? The reason is that the electronics case fan now runs at full speed all the time, and the noise level of all fans combined seems to be 52 dba.
So, I've researched a bit for ideas how to reduce fan noise while not compromising on the cooling and I 've found some promising mods for the Ender 3 with or without new and larger fans and this is a topic, I will talk about in one of the next videos of this playlist on my channel.
Overall, I am pretty happy about this upgrade because the high frequency print noises are gone completely and you cannot hear this printer anymore behind a closed door.
Before the upgrade you could still hear these annoying squeeking sounds even with the door closed through the whole floor, so my family is pretty happy about that.
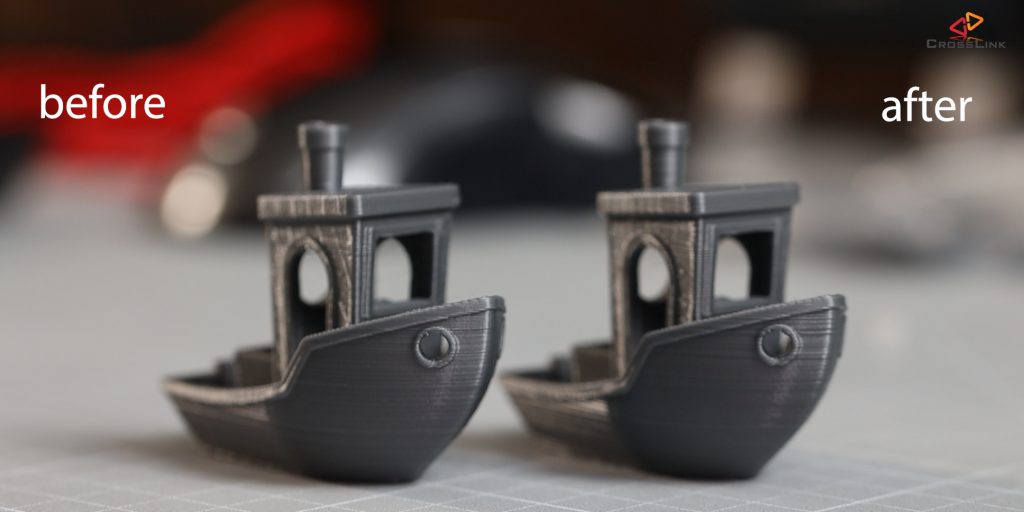
Print quality on the other hand seems to be unaffected. I cannot see any visual difference between these two benchys, but I also didn't expect any change.
So, If you like to get this new mainboard, you can get it on Amazon for about 40 USD, It's an affiliate link, thanks by the way for supporting my channel by using these links. Learn more about how to support this channel here: https://www.crosslink.io/support-me/
Or - Or, you can enter for the giveaway at crosslink.io/free to win one of these brand new mainboards for free. It's also linked in the description and in the top comment of the video.
Next time, we will check whether this board's default firmware has thermal runaway protection, whether there is a bootloader on it by default and how we can configure and flash Marlin Firmware 2.0 onto this board, so stay tuned for that video, it's going to be linked in a card up here as soon as it's ready.
Thanks for reading, don't forget to subscribe to my YouTube channel here, see you next time!
Yours, Daniel
Additional Resources
*** Thingiverse Fan Noise Reduction Upgrade Parts
Electronics case cover for original fan
https://www.thingiverse.com/thing:3619082
Power supply fan silencer cover for low noise
https://www.thingiverse.com/thing:3612639
*** Results Spreadsheet
http://bit.ly/ender3soundlevels
*** Hardware used
Ender 3 Silent Mainboard Upgrade 1.1.5 (affiliate)
? https://geni.us/ender3silentmainboard
*** Additional Links
TMC2208
https://wiki.fysetc.com/TMC2208/
An article about 2208 and 2209 drivers
Loudness and Perception
http://www.sengpielaudio.com/calculator-levelchange.htm