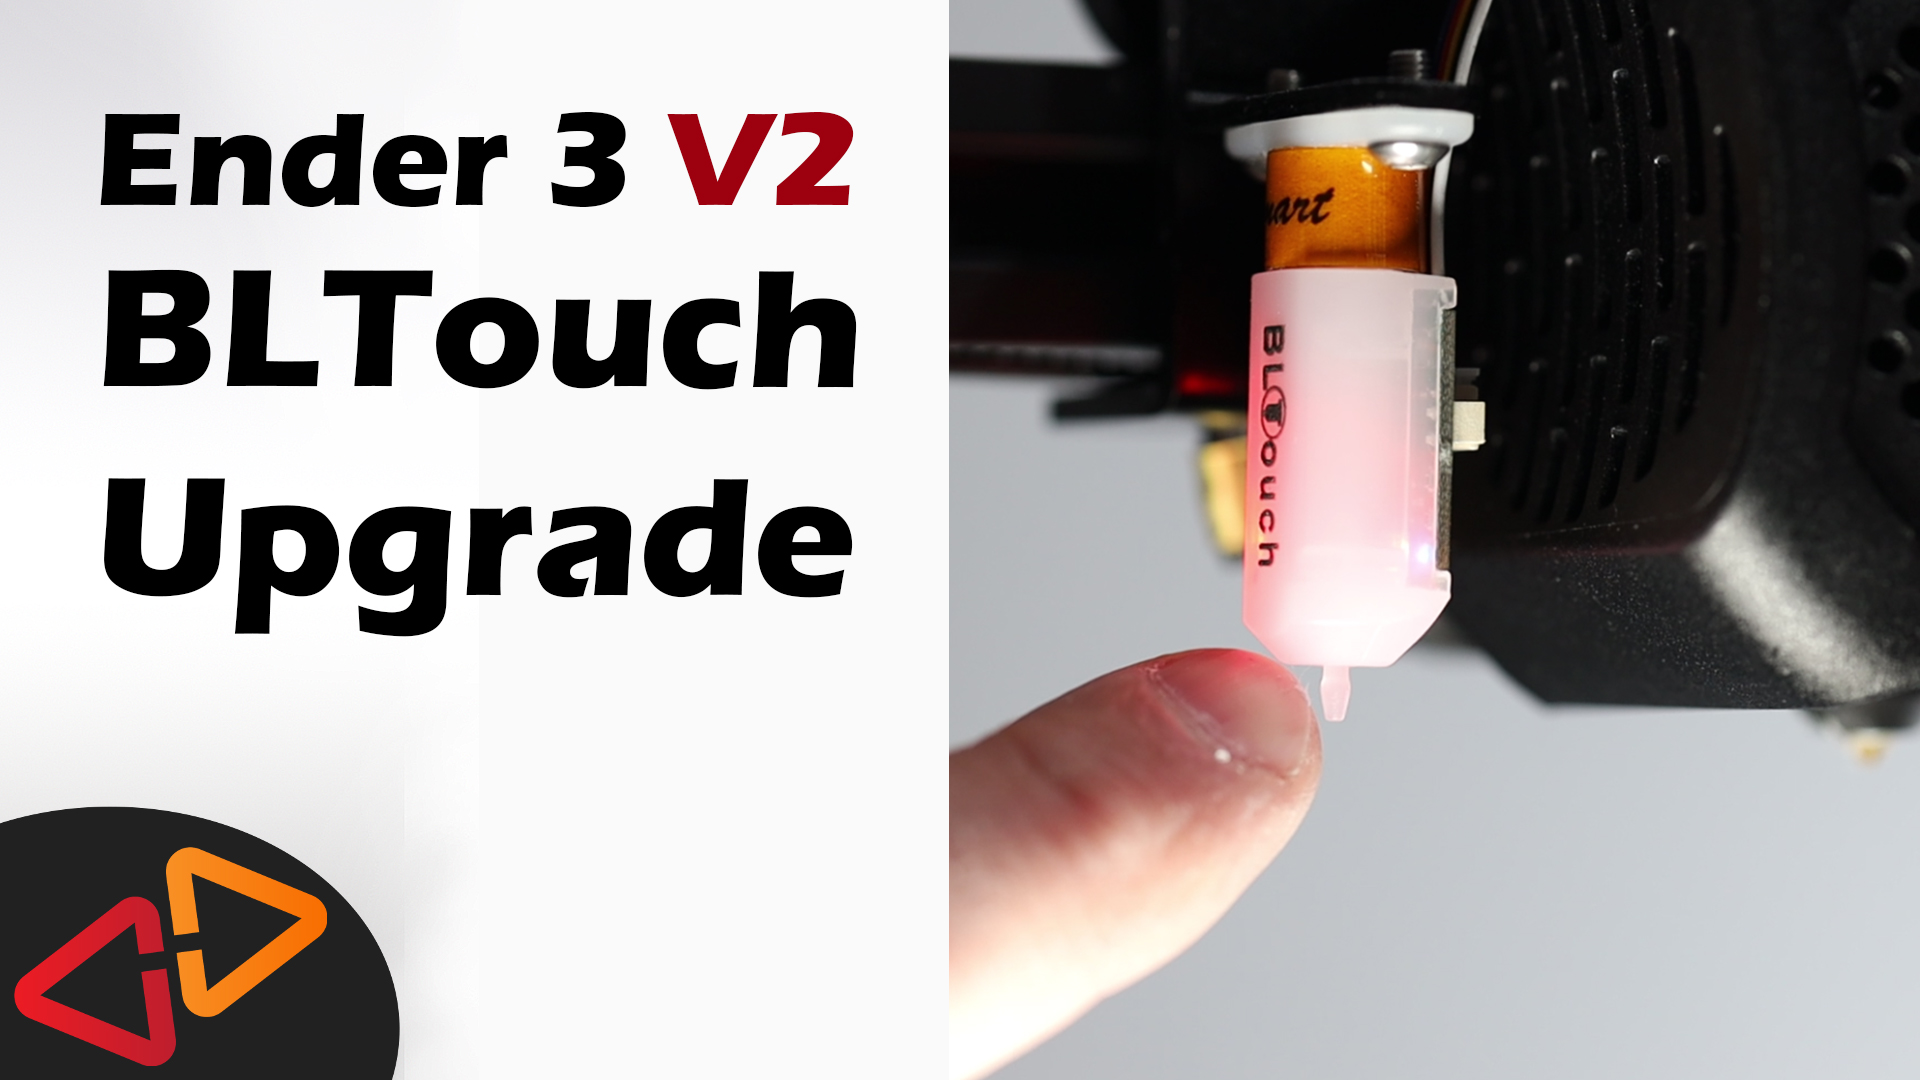
Daniel Crosslink, welcome back to the channel. In this guide, we're installing the BLTouch Bed Leveling Probe on the Ender 3 v2.
The BLTouch upgrade is going to work with both the 4.2.2 or 4.2.7 mainboard that you might also find in the Ender 3 v2, it's just going to be a minor difference in the firmware selection, you'll see that later.
Let's get started with some words about why you probably want to do this modification to your printer.
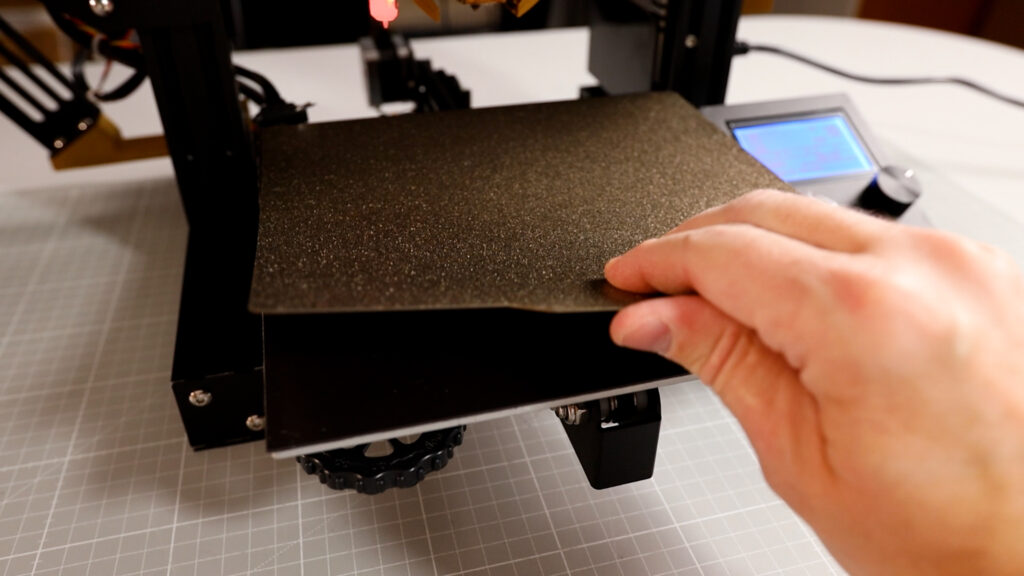
The Ender 3 v2 usually is a pretty reliable printer in terms of print quality and you'll also find it not too difficult to get the first print layer down to the glass bed.
However, there is multiple factors that account for your success in getting a nice first layer printed and one is how flat the underlying surface is.
The glass plate that comes with this printer model is usually quite flat but if there happens to be a slight difference between the corners of the print area and the center, then you might want to compensate those differences for a perfect result.
Solutions for this issue are either using mesh bed leveling or the more advanced unified bed leveling if you don't want to invest in a leveling probe. However both methods bring along a lot more time investment to tune in the right distance in every measured position and swapping out the print surface because you like to print a different kind of material or need a different kind of adhesive will make you re-do the whole mesh bed leveling.
That's why using a probe is the better solution in my opinion, resulting in a much faster and way better automated process - it's also going to be more consistent with different kinds of surface types and if you're going for a removable magnetic build plate, which I really like. It makes even more sense as this won't be in the exact same position every time you take it off and put it back on.
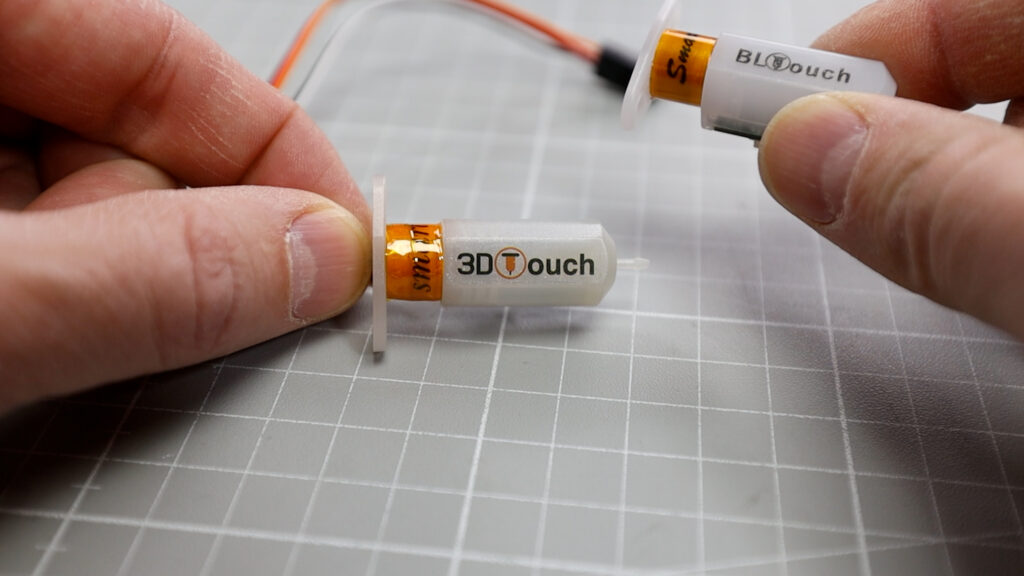
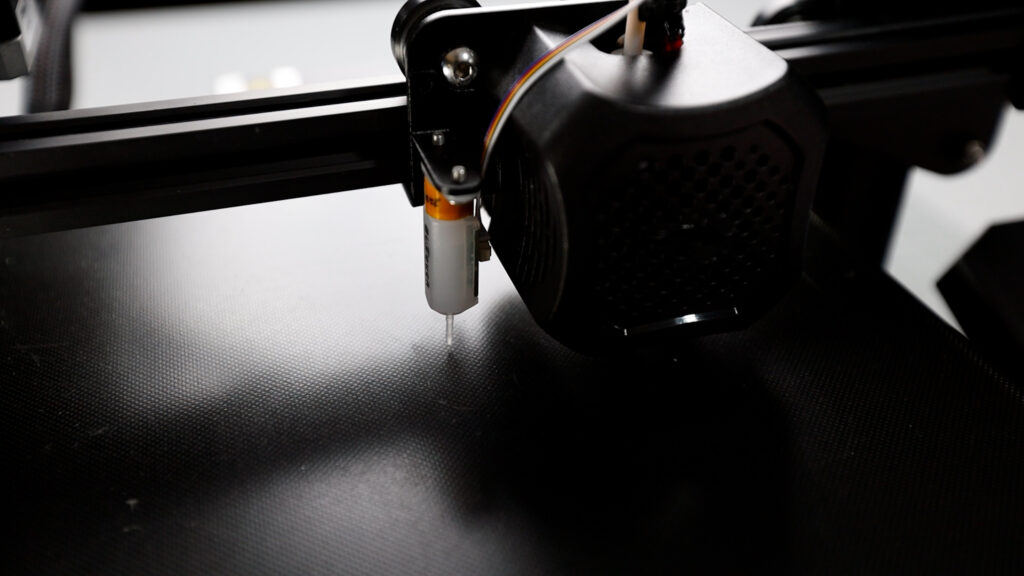
The BLTouch uses a deployable pin to measure a point of contact in the bed leveling process. Depending on if you buy the original BLTouch, which costs around 35-40 USD or a clone version like the 3D Touch or similar ones, which cost around 15-20 USD, this might be a more or less expensive upgrade. All of them will give you reasonable quality results.
Here, we're using the original Creality BLTouch Kit for the Ender 3 v2, which comes with the corresponding holding bracket and the right cable for the Creality 4.2.X mainboard, which makes installation even more convenient.


🛒 Get the Creality BLTouch kit here - https://geni.us/crealitybltouch
🛒 Or the BLTouch standalone sensor - https://geni.us/bltouch31
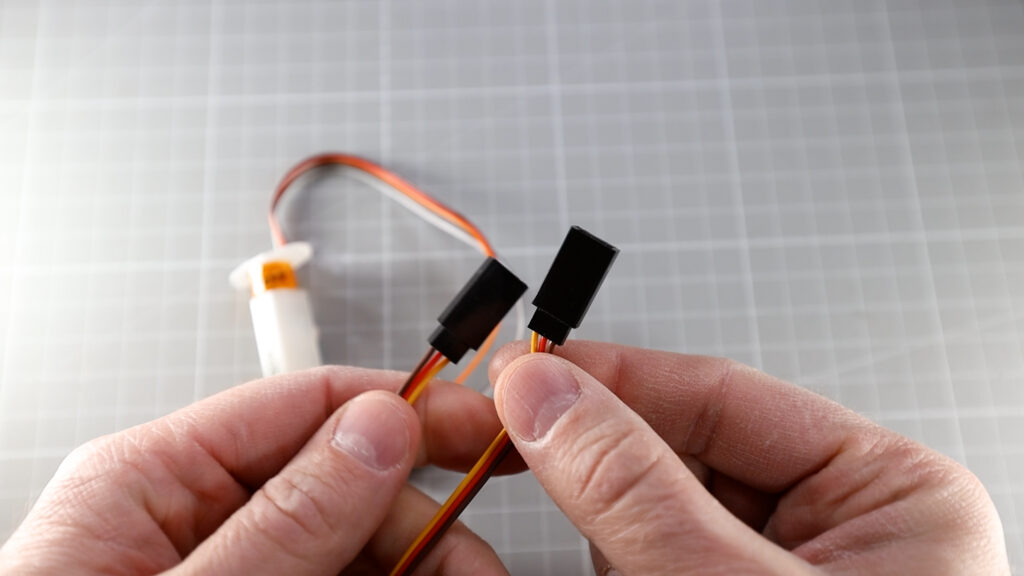
But still, if you're getting the standalone version of the BLTouch, a pair of cheap servo extension cables and some dupont connectors will do the job equally well. You just have to double check that the pin assingment from the bltouch or 3d touch corresponds to the mainboard pinout. We'll talk about custom wiring a bit later in this guide.
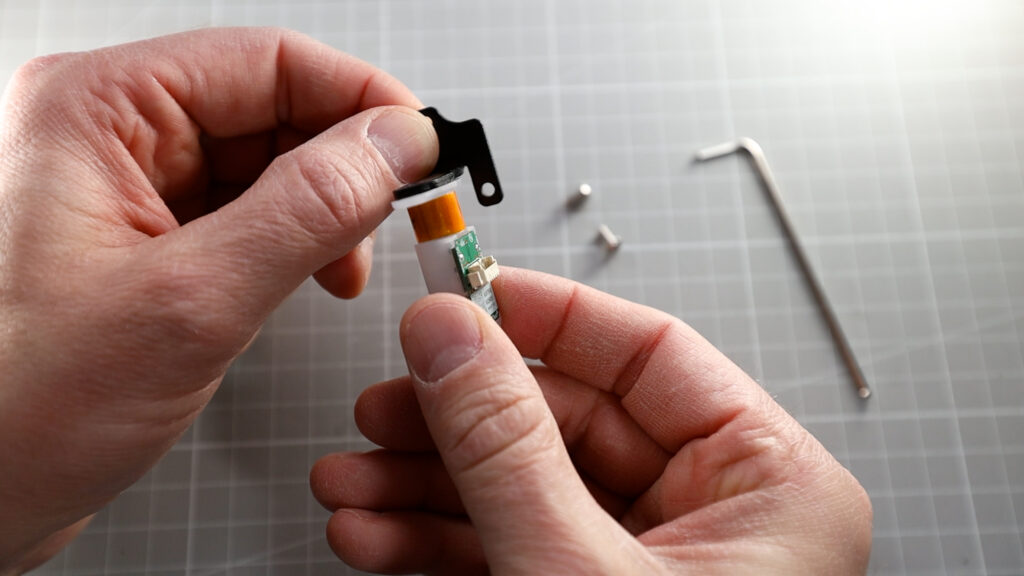
The first thing to do with the sensor is to mount it to the mounting bracket for your printer.
In the Creality Kit, you'll find a specific version for the Ender 3 v2.
If you have ordered the BLTouch or a Clone as a standalone version, you'll first need to print a specific bracket for your Ender model, which I've done here for the Ender 3 Pro just as an example.
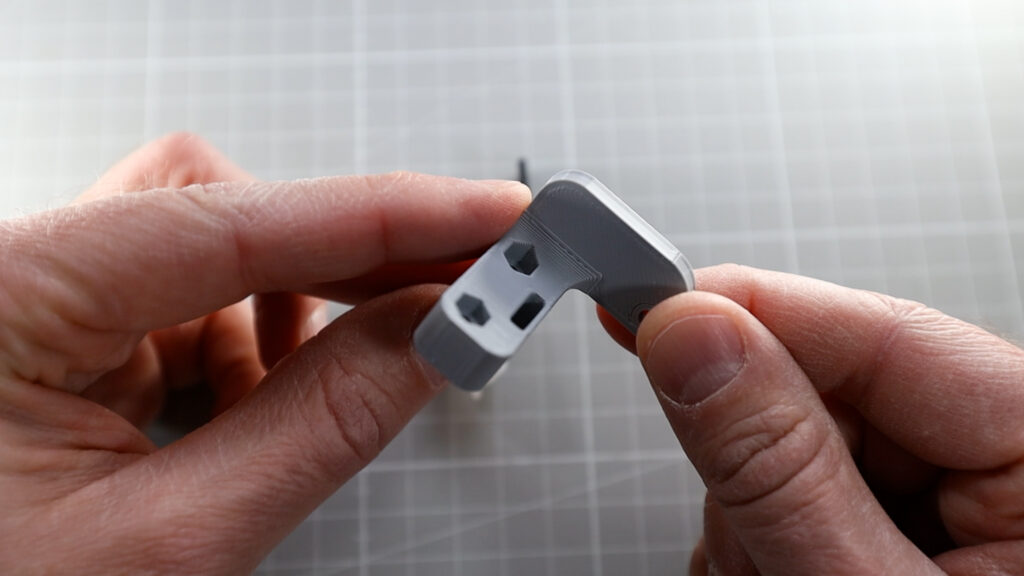
However, In general, I can recommend going for the Kit because the metal brackets are just more reliable and going to keep their external dimensions even if there's a lot of heat coming from the printer.
So I'm going to mount the BLTouch sensor to the bracket with the corresponding screws. I'm using the shorter M3x6mm.
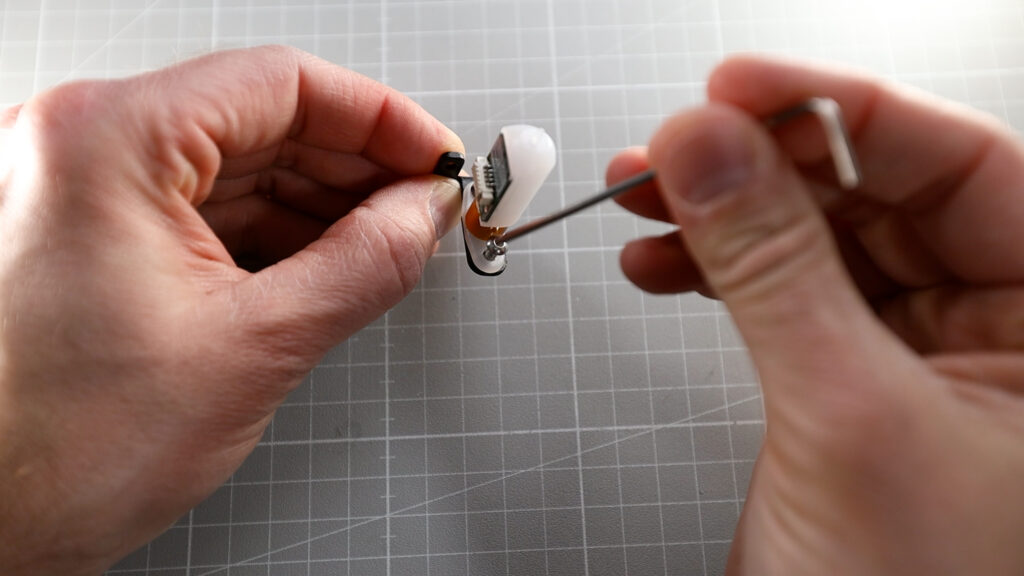
On the backside of the BLTouch I connect the small connector of the connection cable to the BLTouch backside plug. Very carefully pushing that in until it locks in place.
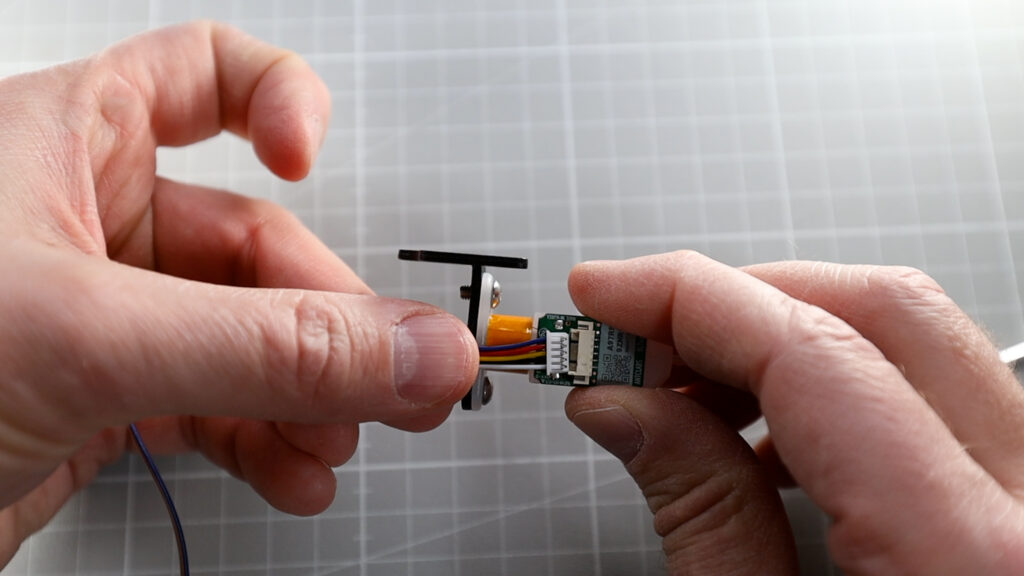
Then I bring the holder in position and normally on the Ender 3 v2 there is going to be two screw holes that perfectly align with the brackets drill holes and you can just use the other two screws to fix the bracket.
However in my case - and maybe for a few of you this might be the same, Creality somehow forgot to drill these two holes - probably because I've got a very early version of the Ender 3 v2. So Instead of fixing the bracket with screws, I'm going to glue the holder to the carriage.
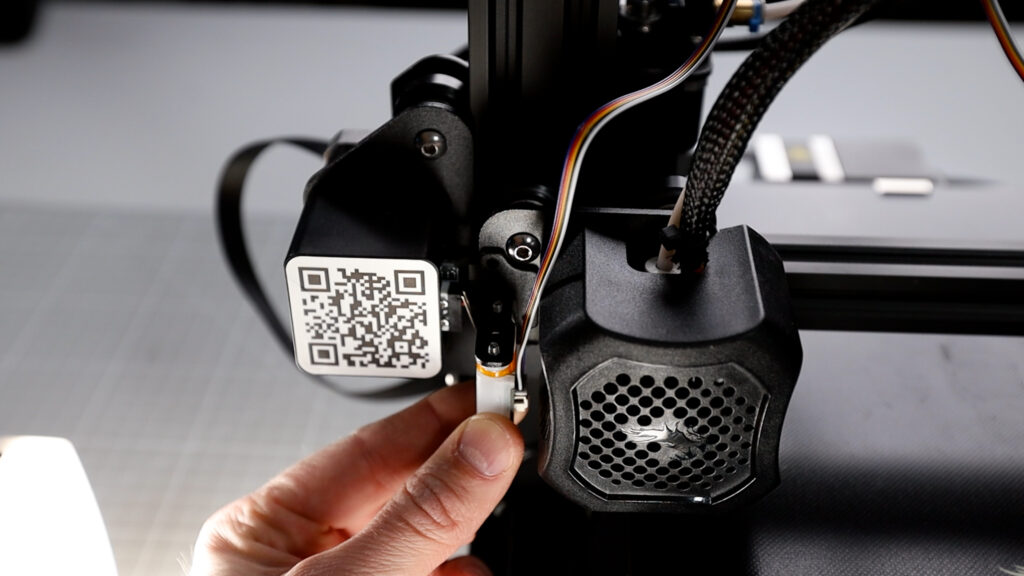
And to find the right distance of the probe to the printbed, I am using a little helper tool - actually that is the one I am always using when I do a custom BLTouch mount.
You can just print this out - and it's going to be inserted between the bed and the sensor. And your printer nozzle should just be touching the buildplate at the same time, this is going to be your reference.
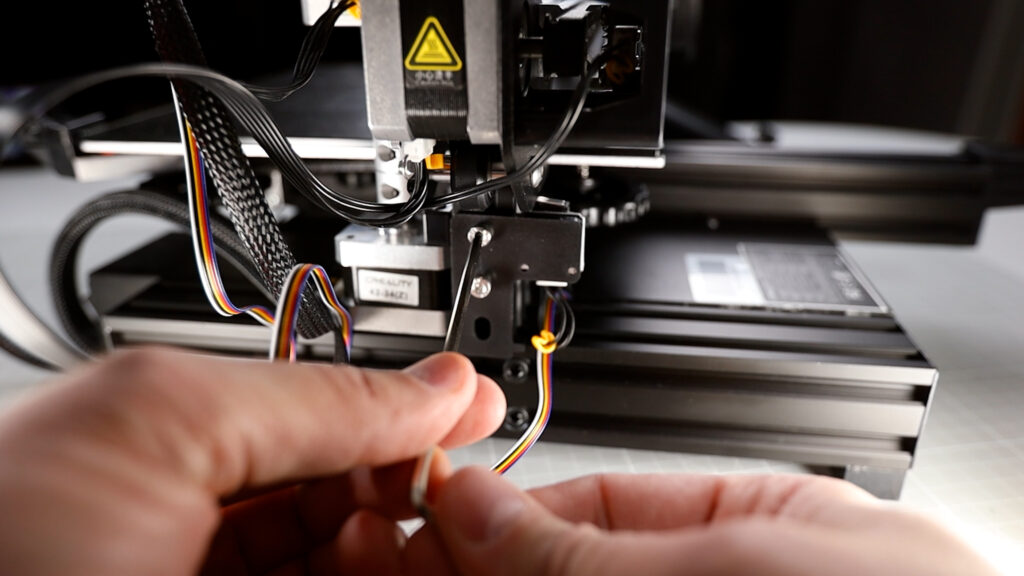
Since the bracket is now fixed let's do the cable connection to the mainboard.
First, I would fix that sensor cable just using a few zip ties along the existing cable wrap that goes down to the mainboard. That's just a little cleaner than just having it dangling around.


I'm opening the electronics box by releasing the screw at the top and at the bottom of the printer that hold the case cover in place.


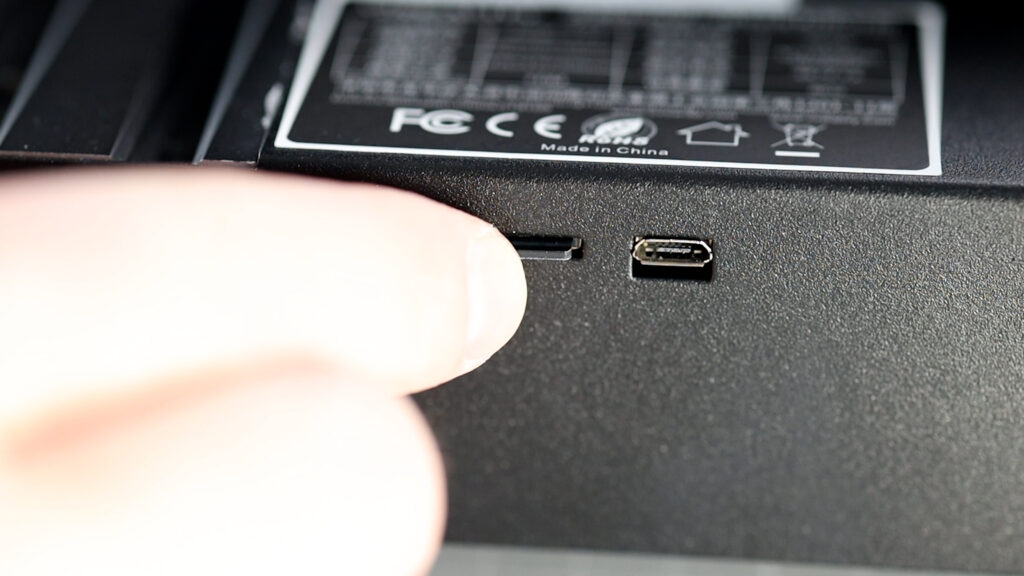
And once it's open the first thing to do is to note the mainboard version. By the time this guide is being written, this is either 4.2.2 or 4.2.7. I'll need that later for selecting the proper firmware for the mainboard.
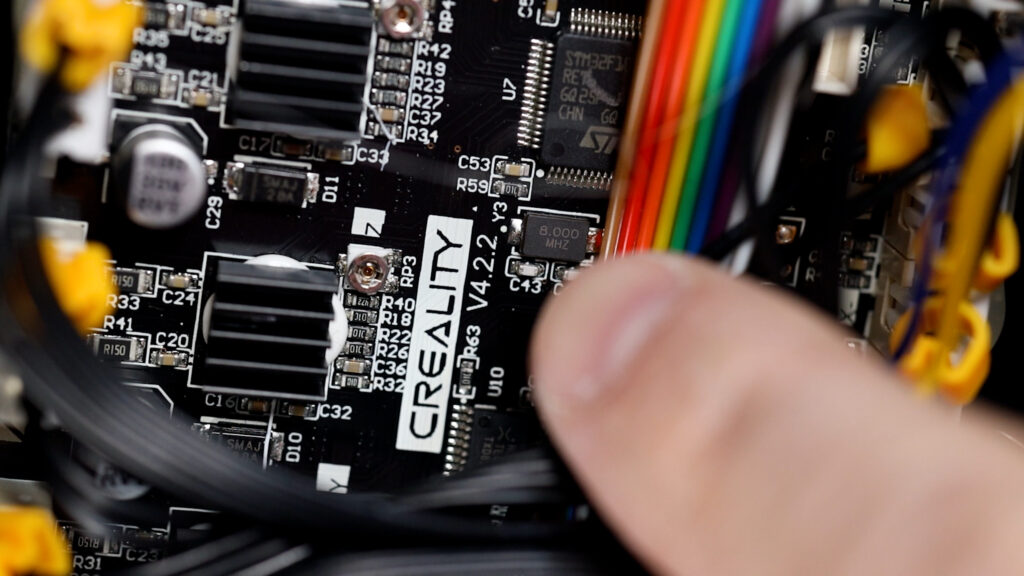
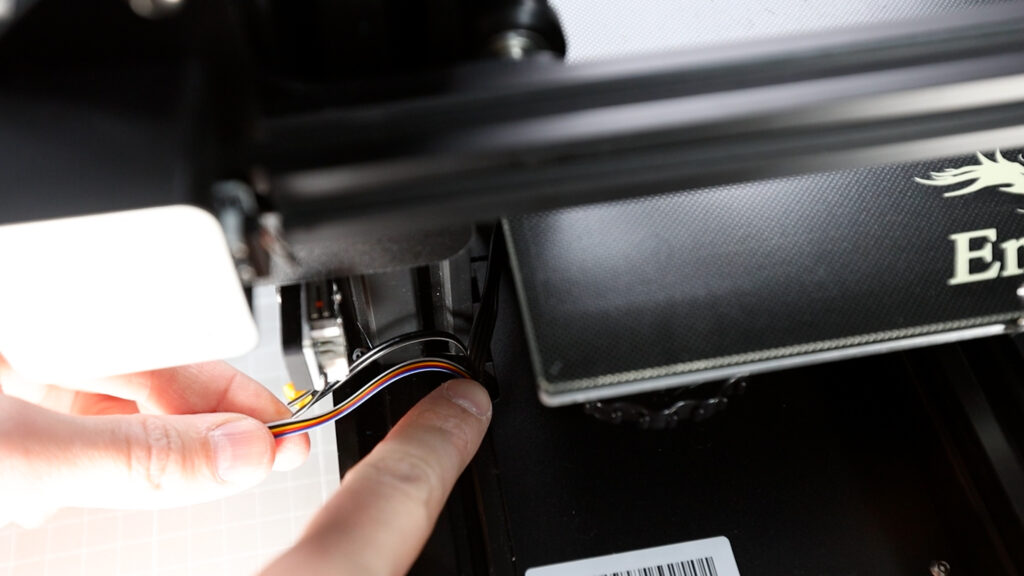
The cable connection to the mainboard is really simple with the Creality Kit. The plug fits perfectly to the socket on the mainboard - and that is everything that you have to do.

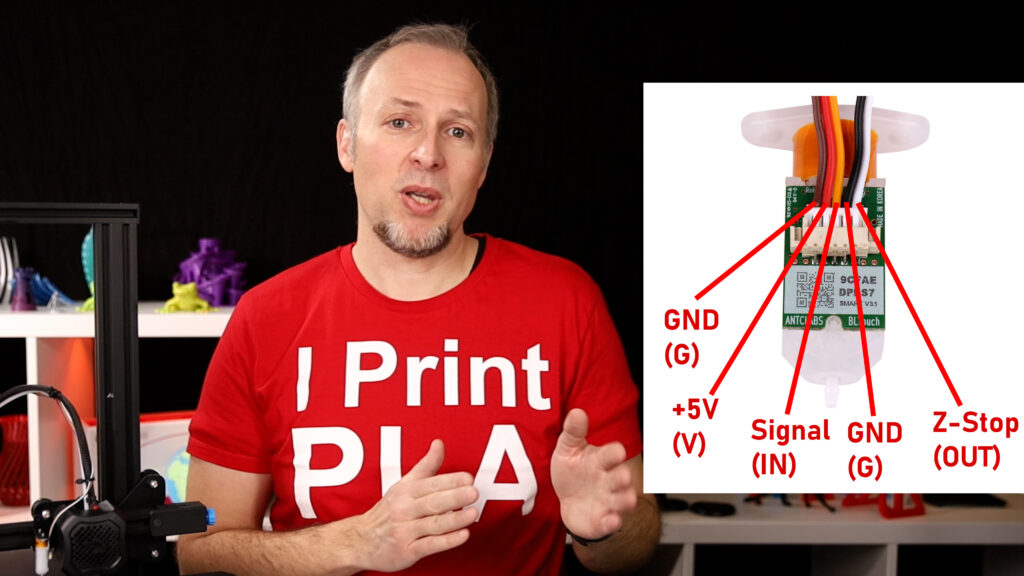
However if you're using a custom cable like a servo extension you will have to double check that the pins going out from the sensor are going into the right pins on the mainboard. Don't look at the cable colors, because these might be completely different.
To make it clear, here is the Creality mainboard pin layout so you can check on the back of your sensor to find the right pins and do the custom wiring.
You see, there is good reasons to use the BLTouch Kit, because that makes it so much simpler and I really highly recommend to use it.
There is one thing left - disconnecting the original Z-Stop cable from the mainboard, because we don't need it anymore.
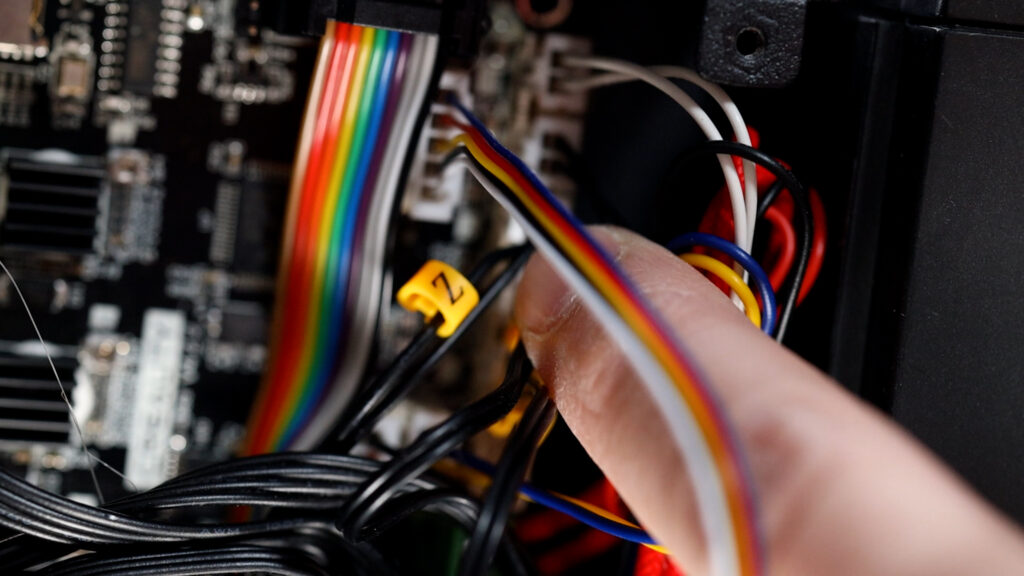
Don't forget to fix the Z-endstop cable in a place where it doesn't obstruct anything else.
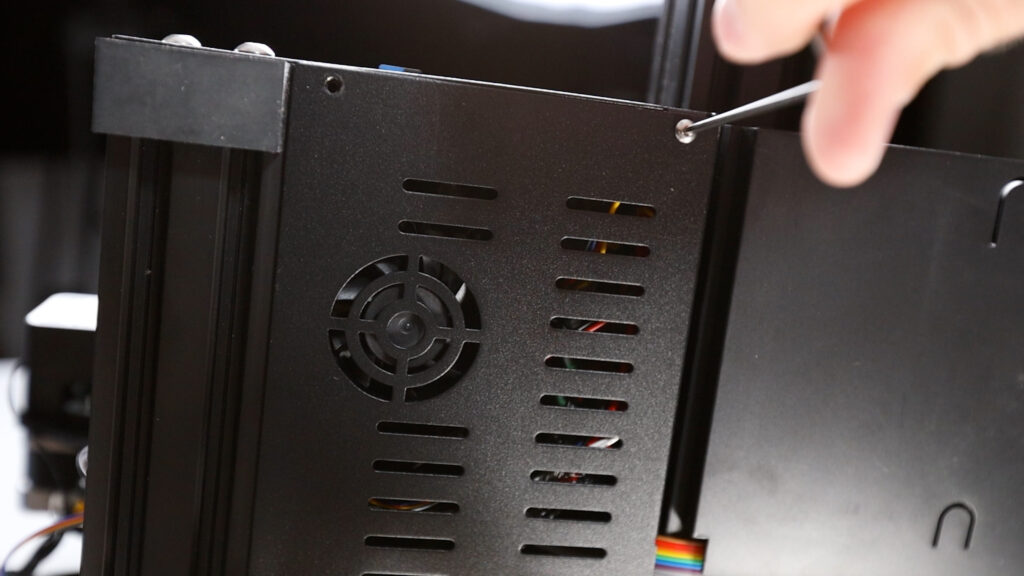
Next, I'm opening the electronics case even further, by removing the two big screws that hold the case fixed to the frame and then I am pulling carefully the sensor cable through the gap, so at the end, I can have it exit the case at the corner where the other cables also exit to the top.


Now I'm fixing everything back in place, the front screws, the bottom case screws and finally the top screw of the case.
And here's why I wanted the cable to come out to the top of the case because we have this little gap here, where the cable fits through just fine and then we can route it to the left where it goes to the sensor along the cable wrap.
Final thing to do here in terms of the hardware installation is to unplug and remove the old Z-endstop bracket with the switch which is now obsolete.
What's left now is to install a new firmware version that supports the BLTouch sensor. I'm taking the one from the Creality homepage www.creality.com - by going to the support and download section.
Here I look for my printer model, the Ender 3 v2 and I also need to select the right mainboard version, so in my case it's 4.2.2 and in your case it might be 4.2.7 - that's why I said, check your mainboard version because it matters.
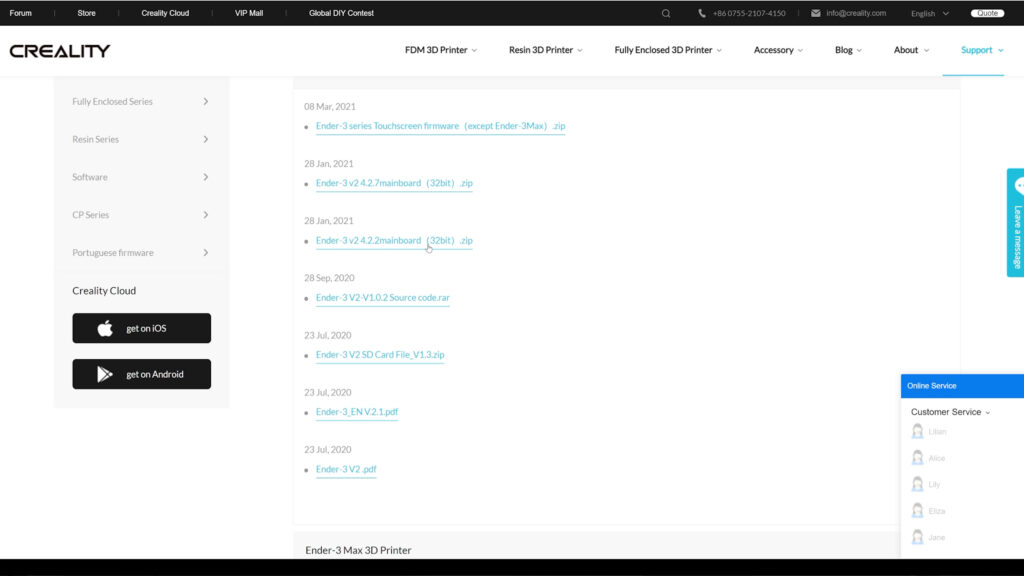
Now, this page might be looking different from what you've seen in other guides because Creality has changed how they package up the firmware. There is just one file per mainboard version now - no individual downloads for bltouch anymore.
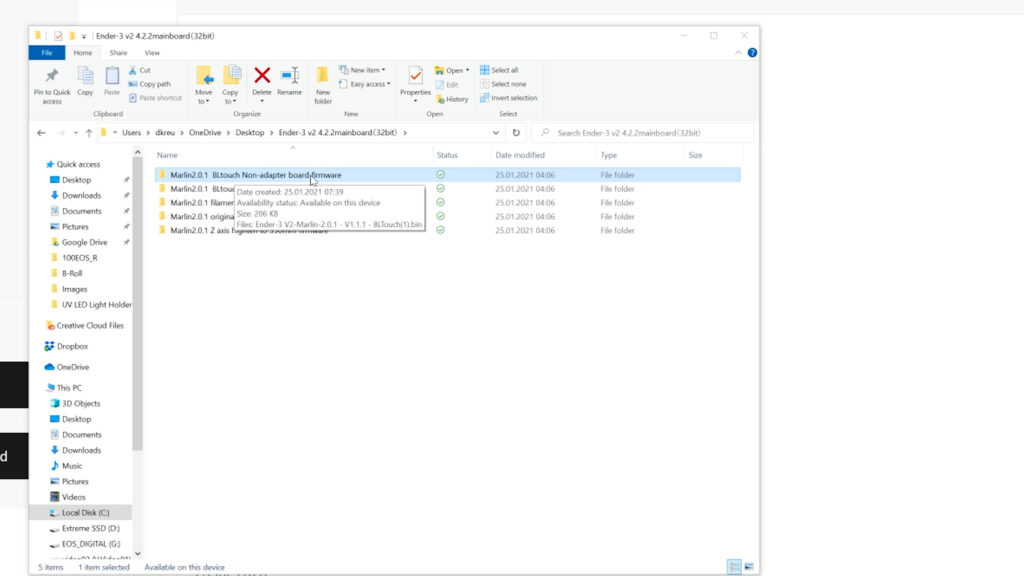
After unpacking that file on my computer, I have different folders for different setup.
The one that we are looking for is "BLTouch non-adapter board firmware", the other one is not relevant for us.
So I'm taking that firmware bin file and will copy that to the SD-Card.
I'm also deleting any previous .bin file that might have existed from previous firmware installations, please don't forget about this.
Then I'm inserting the SD card into the printer.
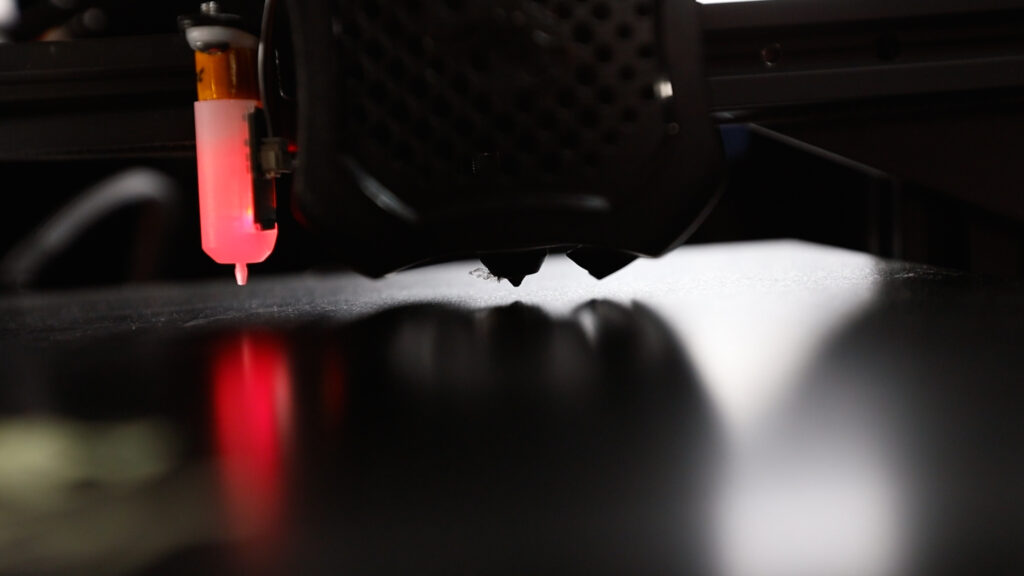
Once I've turned off the power and turned it back on, the printer will install the new firmware.
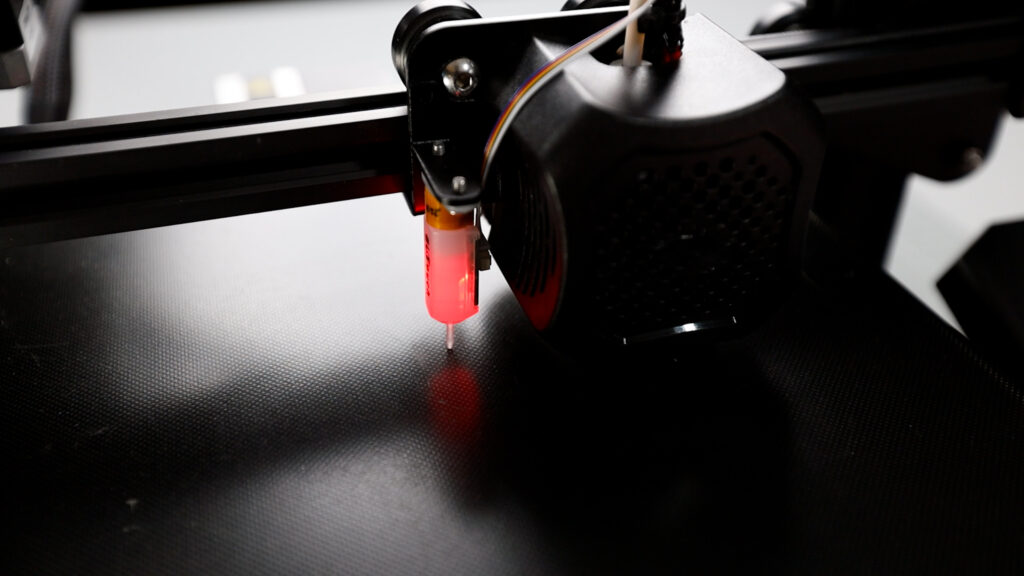
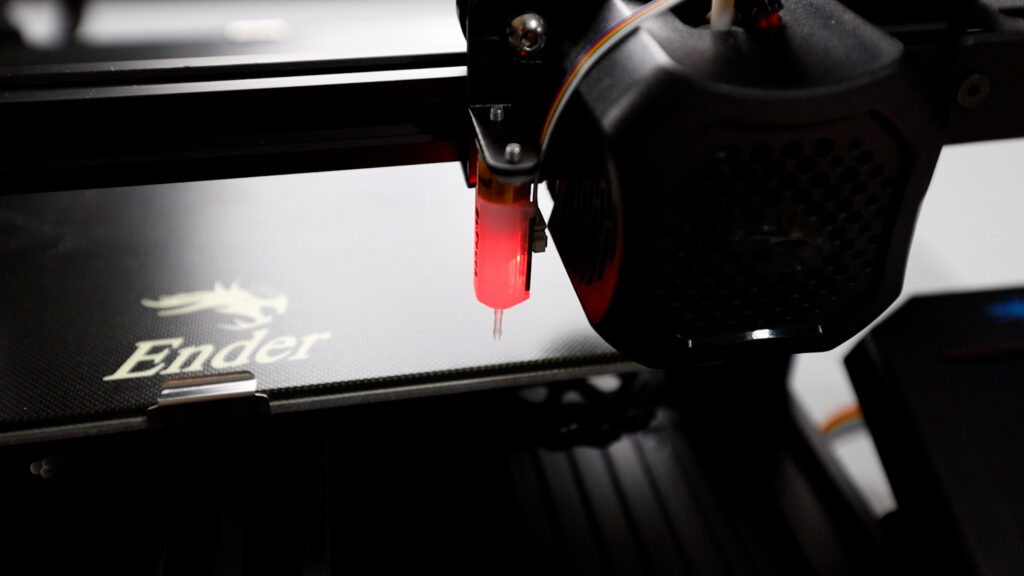
Also, the BLTouch sensor should turn red and do it's little up down dance. If it doesn't finish with the pin retracted or if it's blinking something about the wiring might be wrong or the firmware might be incorrect, so in that case, double check everything.
On the printer main menu, there will be a new item called, "Level".
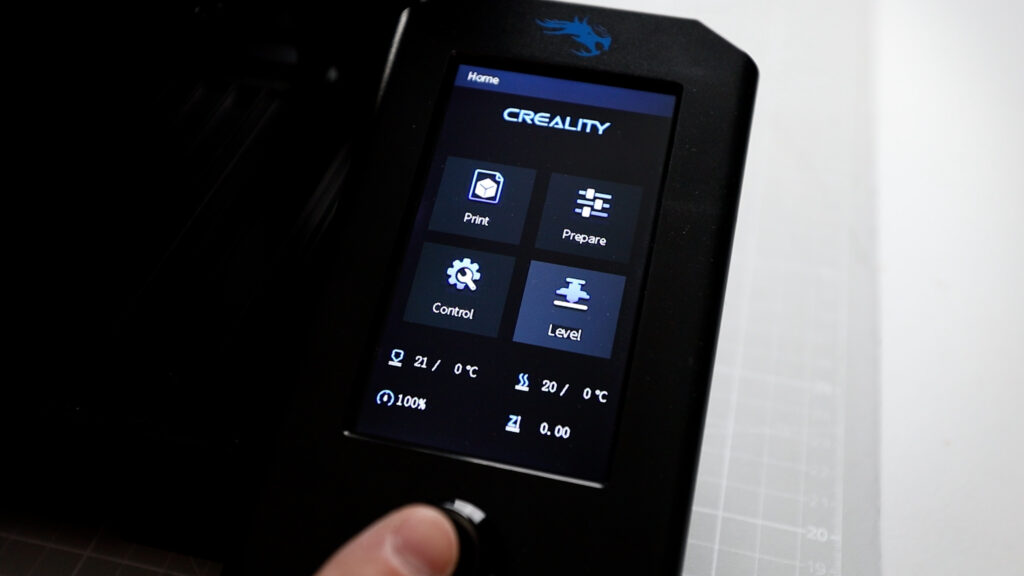
I'm selecting that item and the printer will start doing a bed leveling in 9 points of the print area.
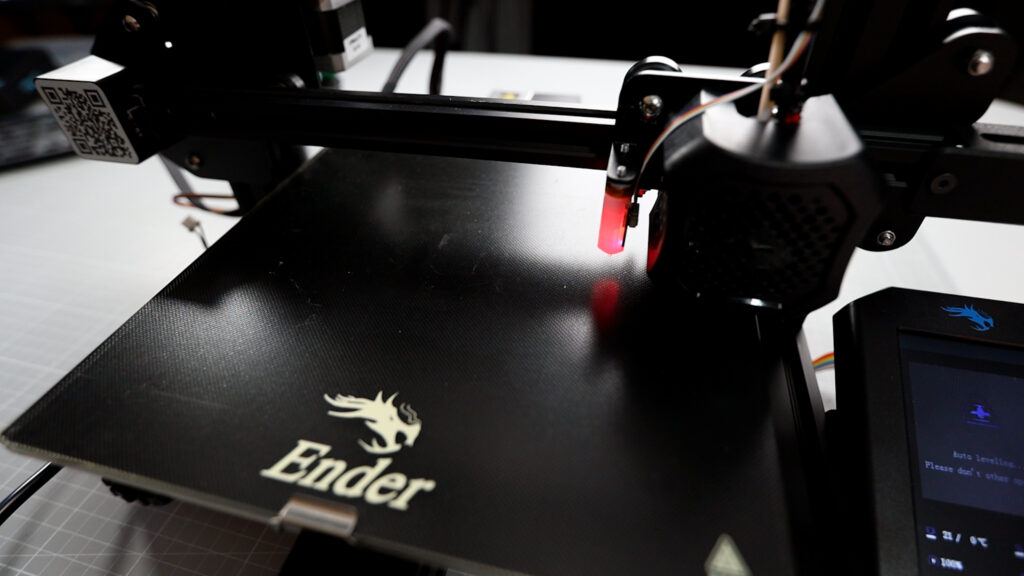
After that's done, I am going to select the prepare menu and then Auto-Home.

The sensor is going to measure the distance in the middle of the bed and then stop at a higher position.
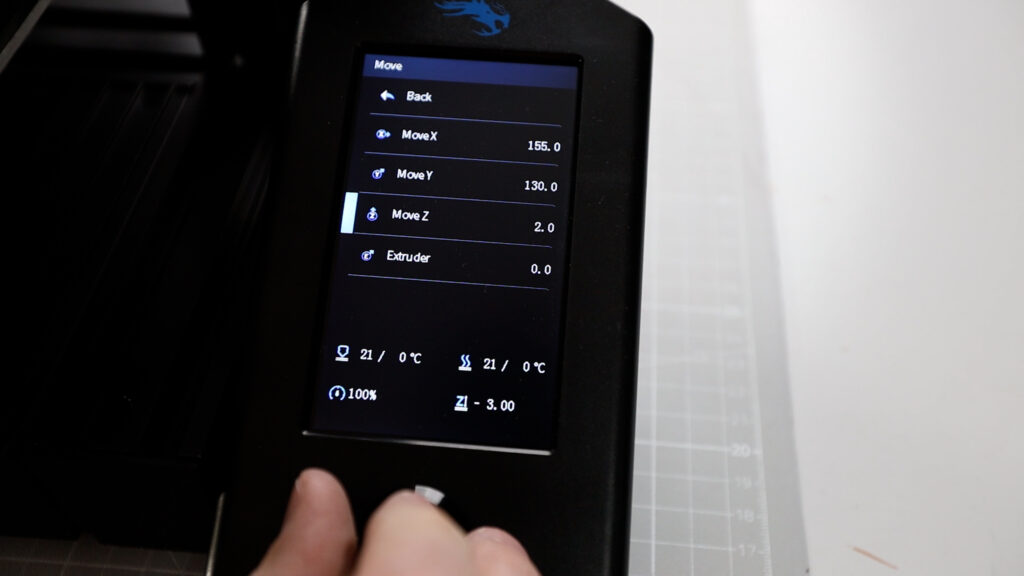
Now, I am bringing down the nozzle to the actual zero position by selecting the Move-menu and then the move-z item.
I'm turning the knob until it says 0.0 and then I confirm.
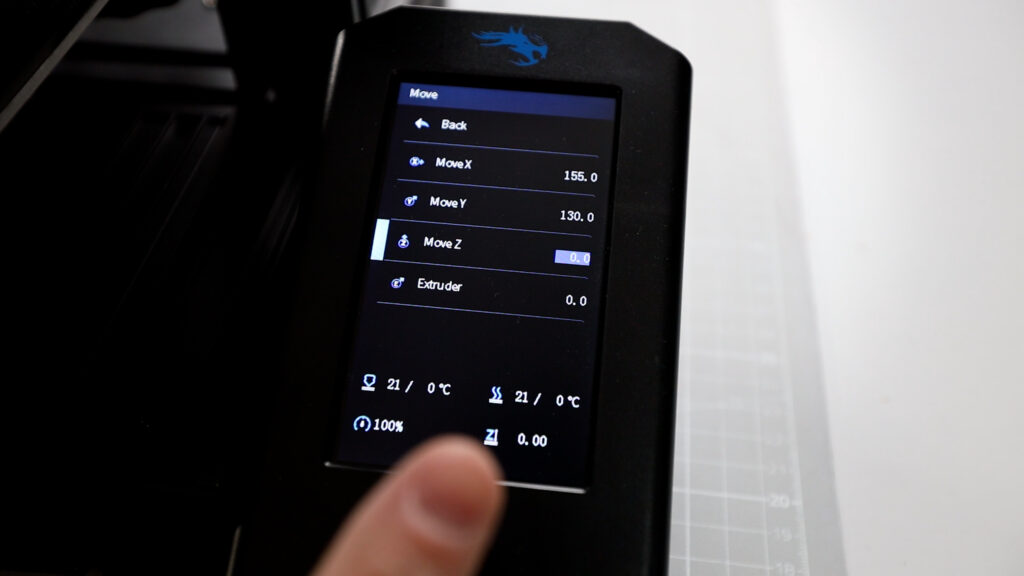
The nozzle is now down at the zero position but still probably 2-3 mm away from the print surface.
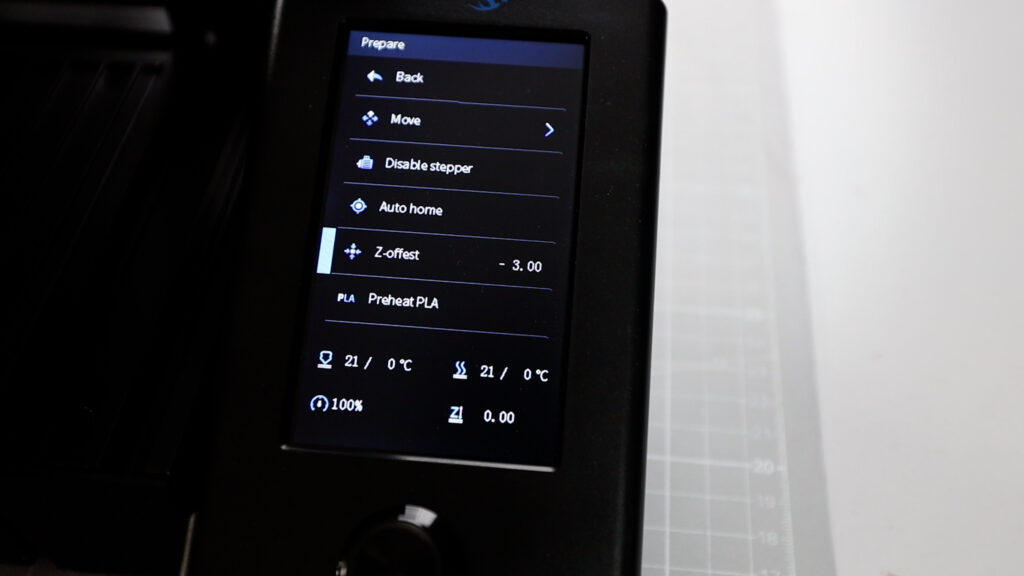
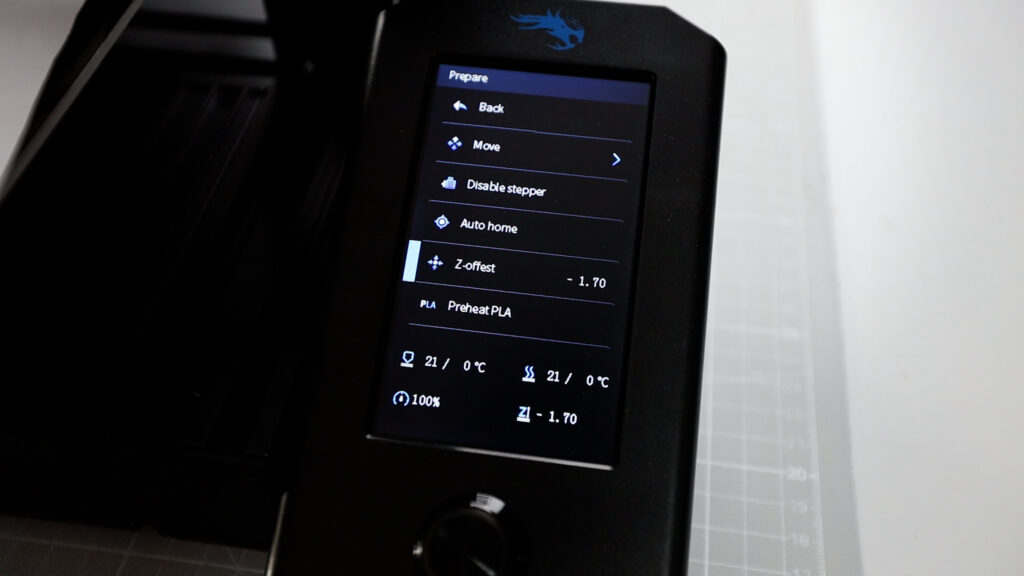
So what I need to do now is to set an initial z-offset to start with, so I'm going back to the prepare menu and then I'm selecting the z-offset item and set it to minus 3.00.
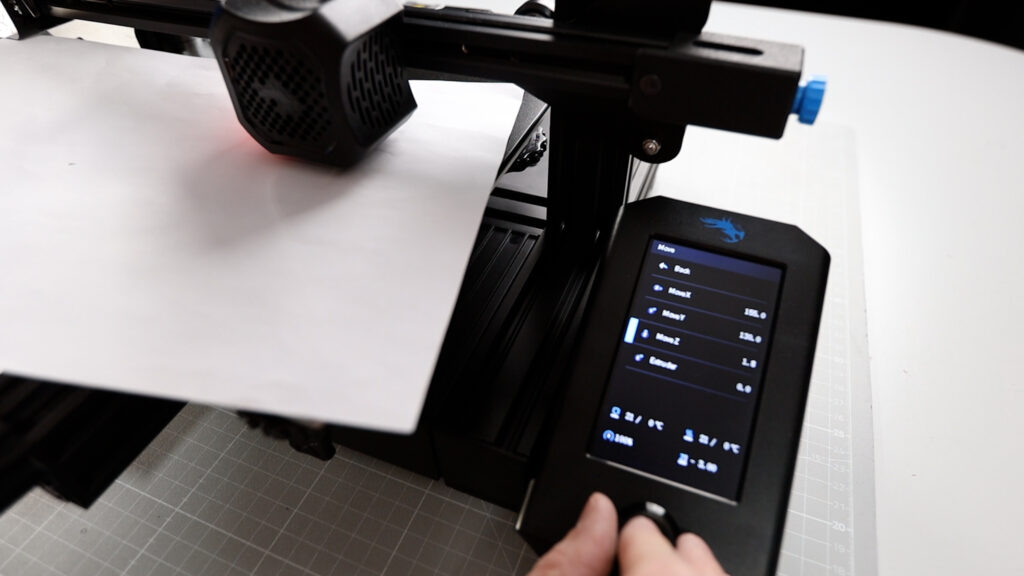
Another time, I am now going to select Auto-Home and I am bringing the nozzle down to 2mm just to start with using the move-z menu.
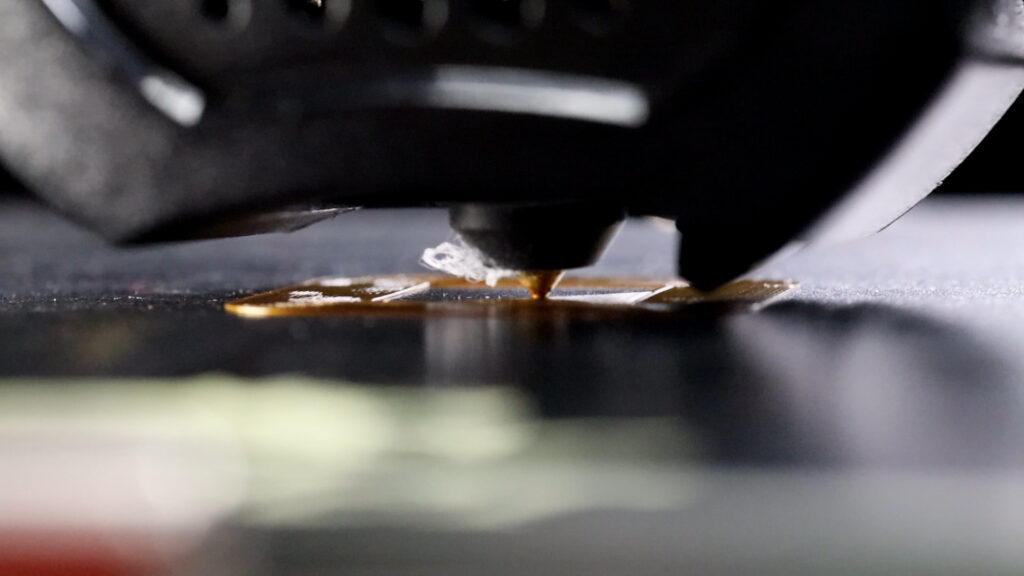
Now, while inserting and moving a piece of paper, I am bringing the nozzle down in 0.1mm increments. You have to confirm a new value every time you change it.
The distance, I found to be good in my case is 1.3mm and that is going to be our correction value for the z-offset.
You remember, I set it to -3.00. Now I am adding the new offset of 1.3mm and I so I will change it to -1.7 and confirm the new value.
Again if you repeat the auto home now and bring the nozzle back to 0.0 it should be at the desired distance and if not, you need to change that value accordingly.
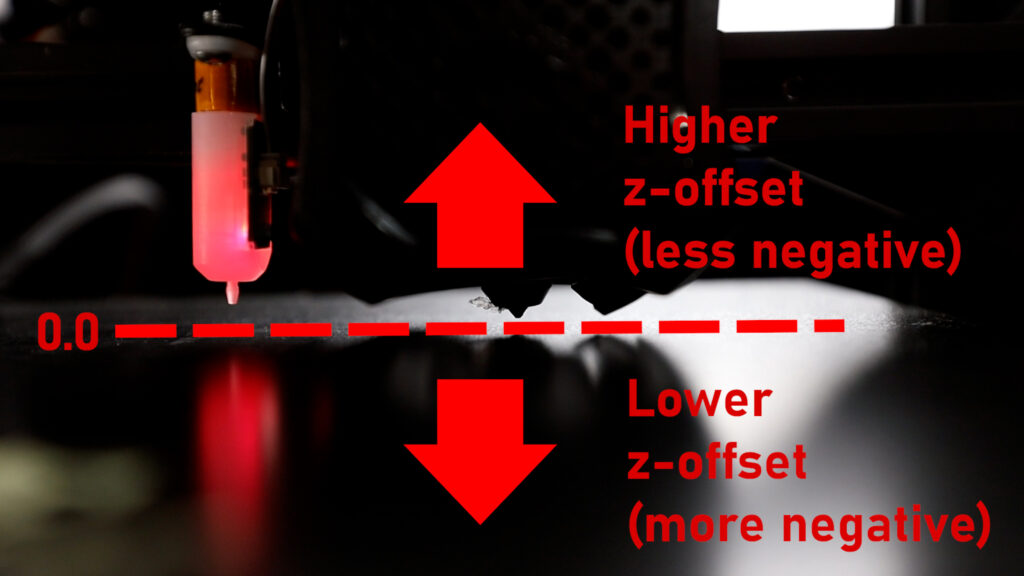
A more negative z-offset value brings the nozzle closer to the surface whereas with a less negative z-offset, the nozzle will be further away from the surface, when it's coming down to 0.0.
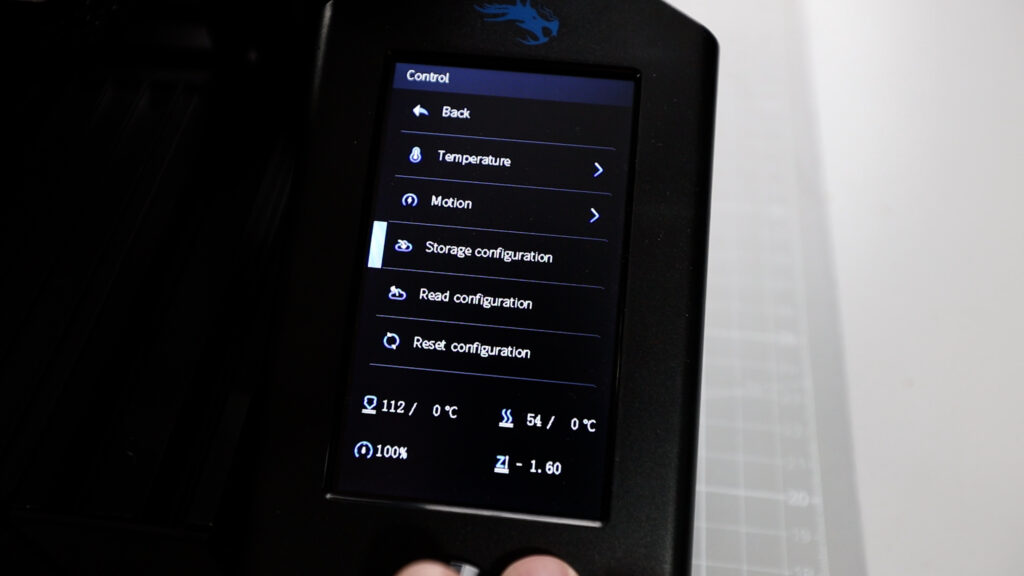
Finally, I'm saving my settings, using the Control menu and then selecing the Storage configuration item. That makes sure, my current z-offset is saved to the printer, otherwise it will be lost as soon as I power off the printer.
To use auto bed leveling in your prints going forward you will have to modify the startup code for your printer, that's being generated by your slicer software.
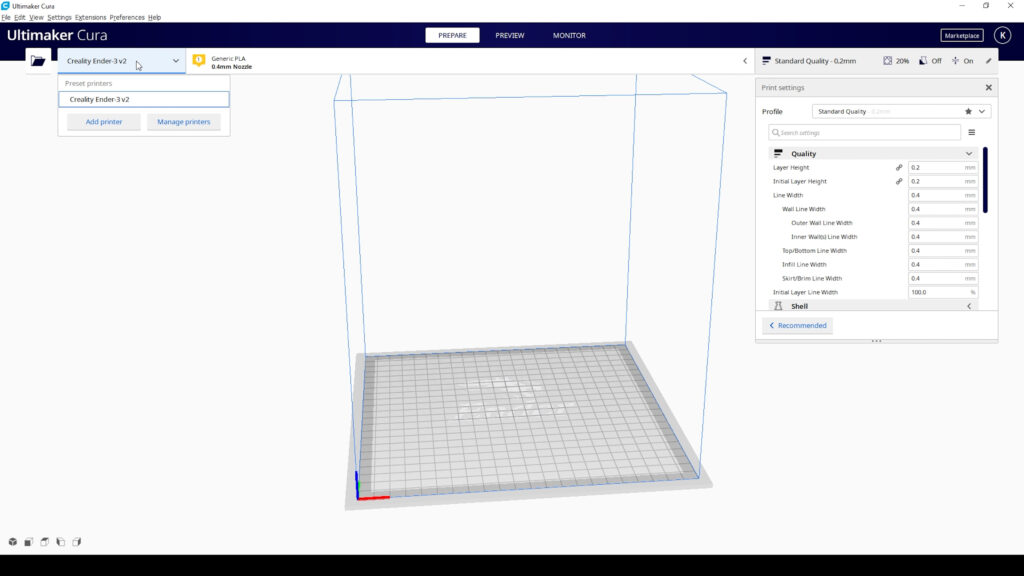
In my case that's going to be CURA.
In CURA, I am selecting my printer from the dropdown menu, then I click Manage Printers.
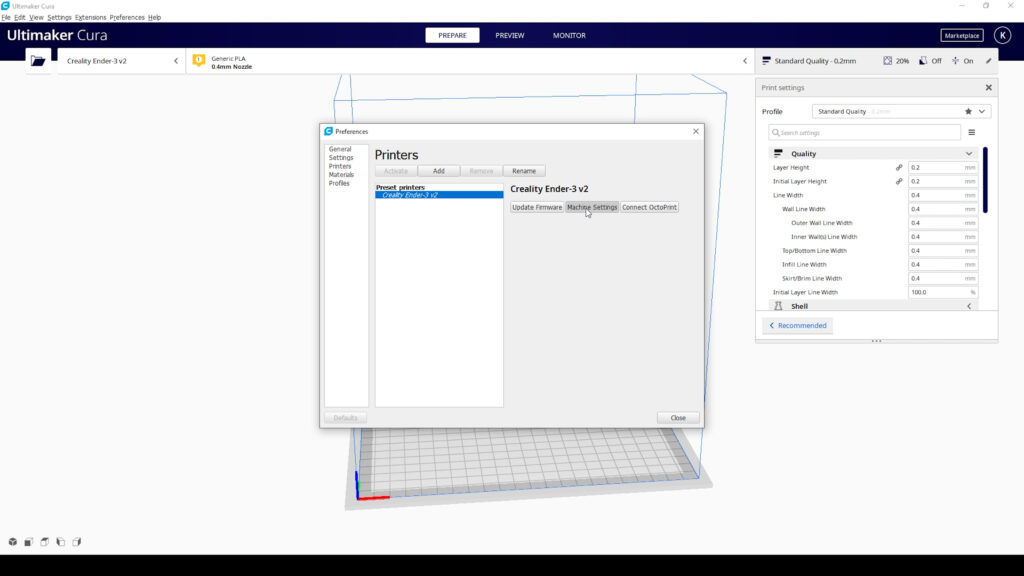
Then, I go to the Machine Settings.
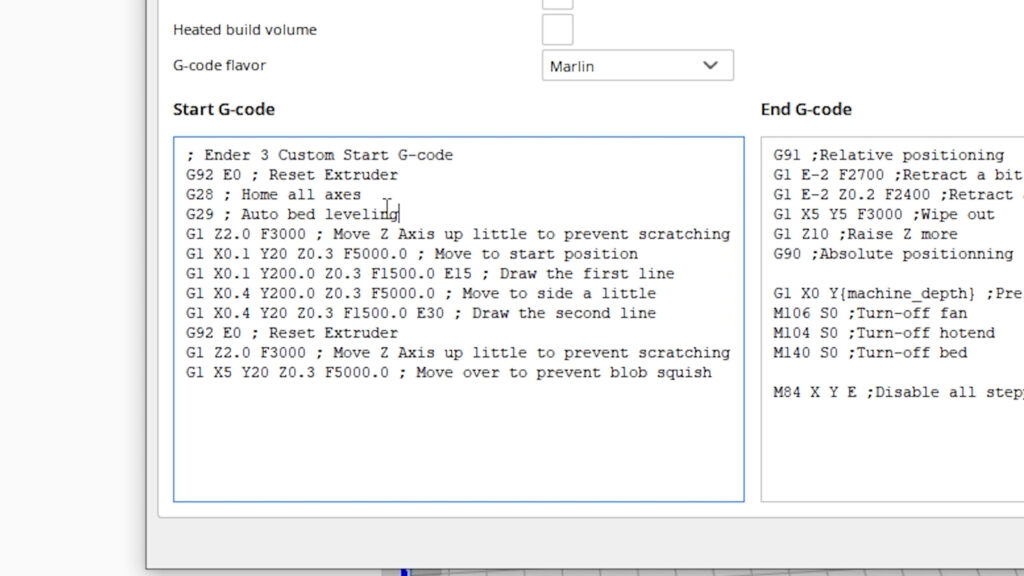
And here in the Start G-Code panel, I look for the G28 command, here it is.
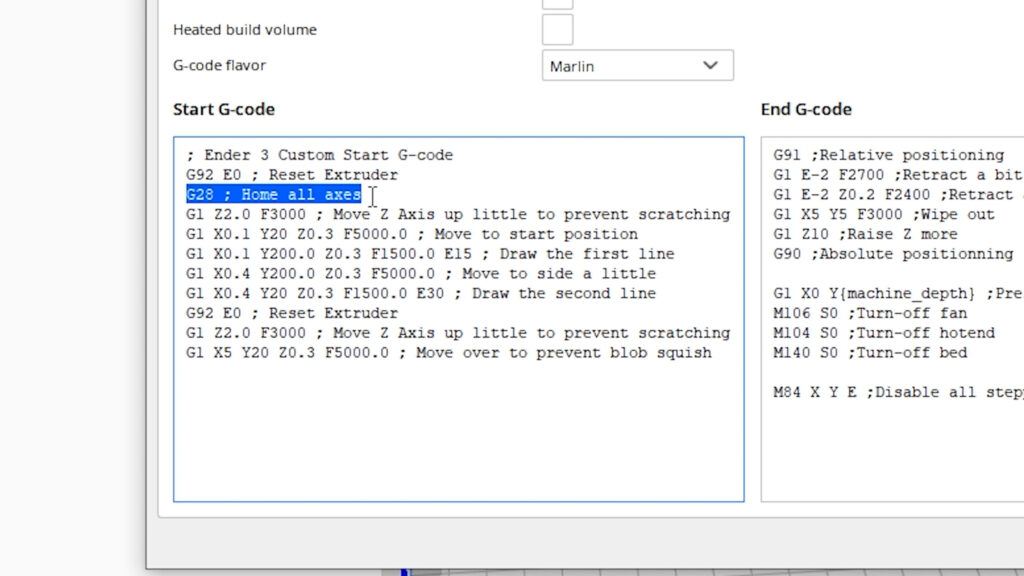
I am adding a new line right after G28, which will be the G29 command for auto bed leveling.
Then, I can close these dialogs.
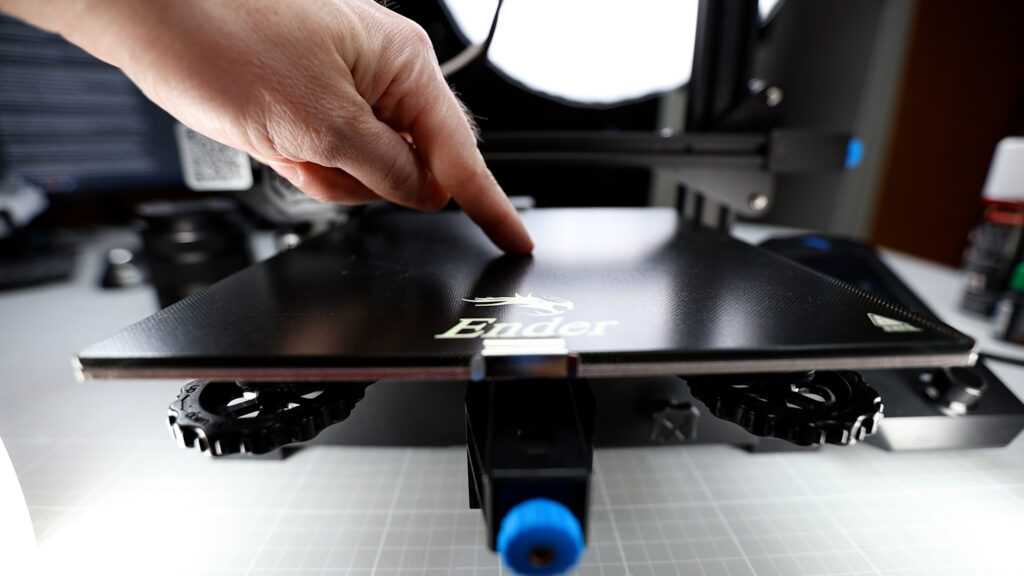
What I'm doing as a final confirmation of my settings is to start a test print, so I can see, whether I have the right distance and the right amount of squeeze of filament to the print surface. And if I see that it's not ideal, I can tweak it during the print using the Tune menu of the printer.


That's my guide about the BLTouch installation on the Ender 3 v2.
If you liked this content, please consider supporting my work by becoming a Patron so I can continue making this available to you for free: https://www.patreon.com/crosslink.
THE PRINTERS I USE: https://kit.co/danielcrosslink/the-3d-printers-i-use
MY MERCH: https://www2.crosslink.io/shop
BECOME A PATRON: https://www.patreon.com/crosslink
CHAT ON DISCORD: https://discord.gg/ne3J4Rf
BUSINESS INQUIRIES ONLY (OR IF YOU WANT TO SEND SOMETHING) - DANIEL@CROSSLINK.IO
FOLLOW ME:
INSTAGRAM - https://instagram.com/danielcrosslink
TWITTER - https://twitter.com/danielcrosslink
FACEBOOK - https://facebook.com/danielcrosslink
WEBSITE: https://www2.crosslink.io
The Music I use: https://www2.crosslink.io/es, AMAZING for YouTubers!
GEAR USED
https://kit.co/danielcrosslink/my-video-gear
Disclaimer: As an Amazon Associate I earn from qualifying purchases.