
Daniel Crosslink, welcome back to my final review of the FLSUN Q5 one of the most affordable delta printers on the market in 2021.
This device was given to me by FLSUN for free, but as every time on this channel, this is a completely independent review with all the good, the bad and the ugly details.
🛒 Get the FlSun Q5 here: https://geni.us/flsunq5
▶️ My build and first impressions video of the Q5: https://youtu.be/cBTS19beA5E
▶️ Q5 3D printing timelapses: https://youtu.be/X1Mq4SC2WuQ
▶️ Watch the Ender 3 v2 Review: https://youtu.be/I6LHam6m3g4
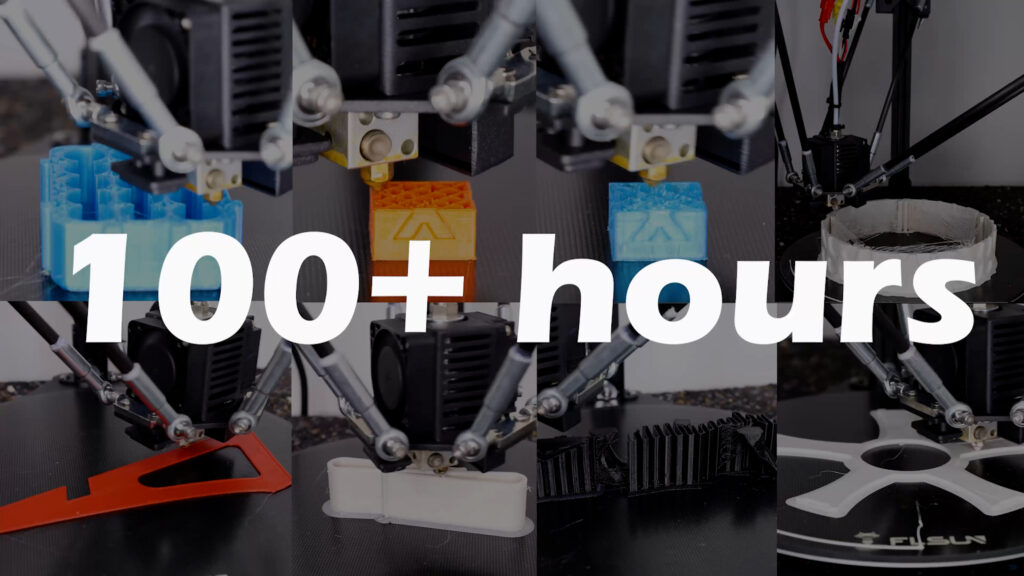
I've put a lot of time into test prints, around 142 hours actually to get really into all the depth required to make this review, so stick around for those results.
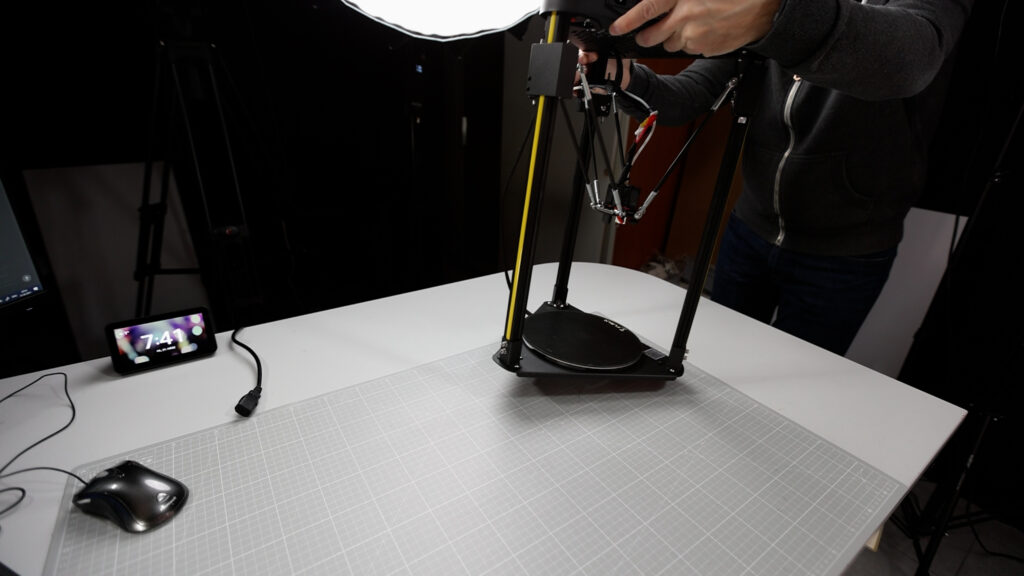
The Build
Let's start with how easy it is to get started with this printer
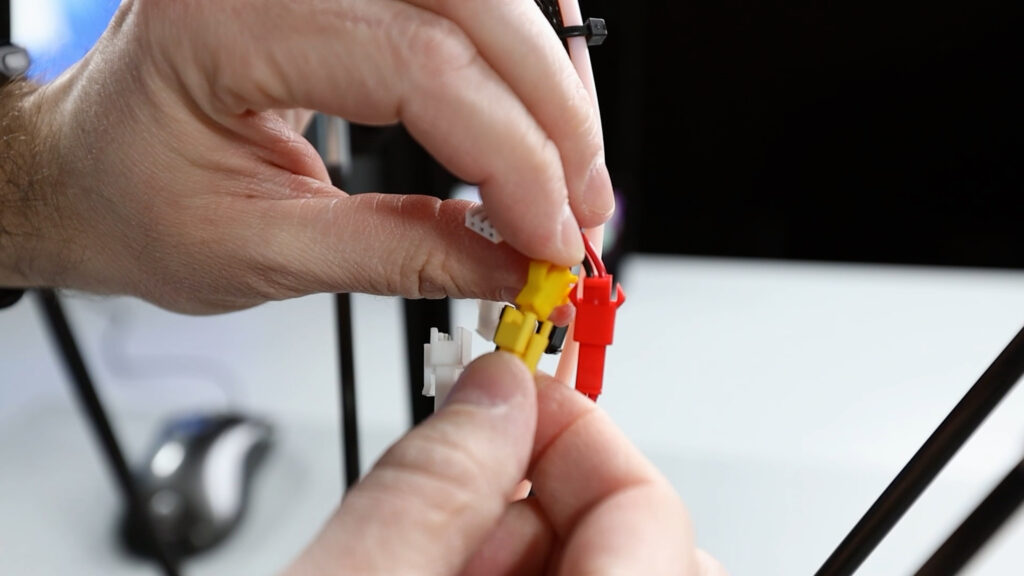
The build was super quick, around 30 minutes to get the frame assembled and connecting all the cables.


Everything is labeled so you can't make any mistakes and the plugs are colored so you will know easily, which ones belong together.
Another good thing, there is only one type of screw on this whole frame assembly, so no searching for the right screw in multiple bags like with other printers and also no searching for the right hex driver.
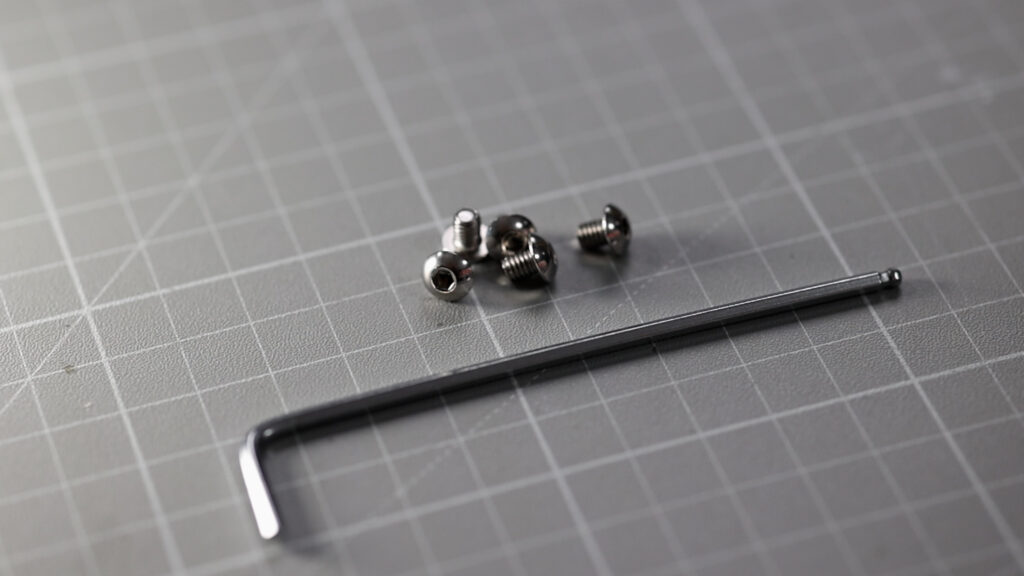
This is just a detail but it makes assembly so much easier - and faster.
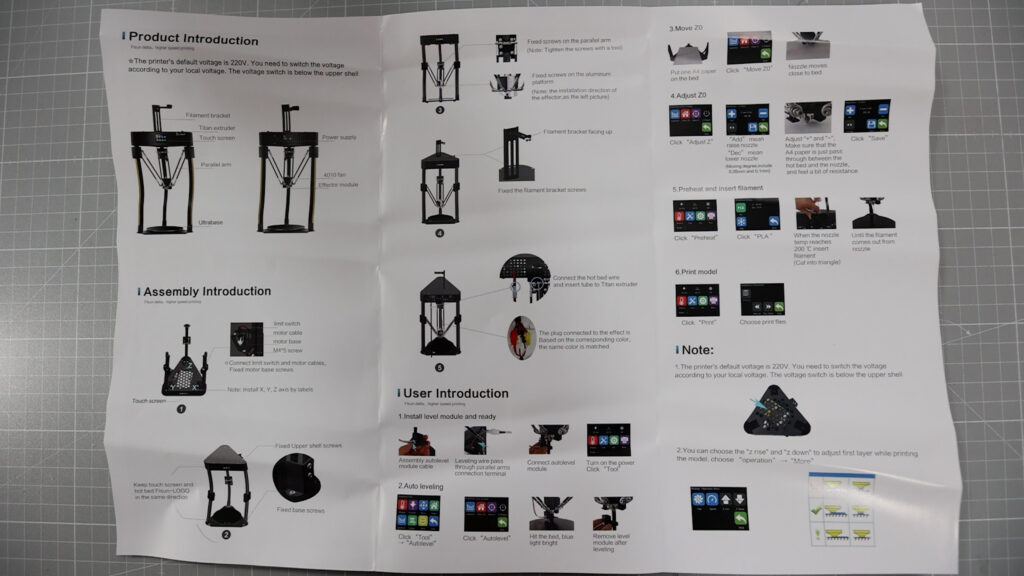
The manual is short but quite understandable, actually I did miss the fact that the full guide is actually on the SD card, so sorry for not finding that in the build video.
By the way, if you're interested to see more of the build process, I've linked my build video here, there is more details about how the build worked for me and how I got my first testprints done.
And once the frame was assembled, I realized, it's quite sturdy but it's also quite top heavy because everything, electronics, motors and power supply are in this top compartment.
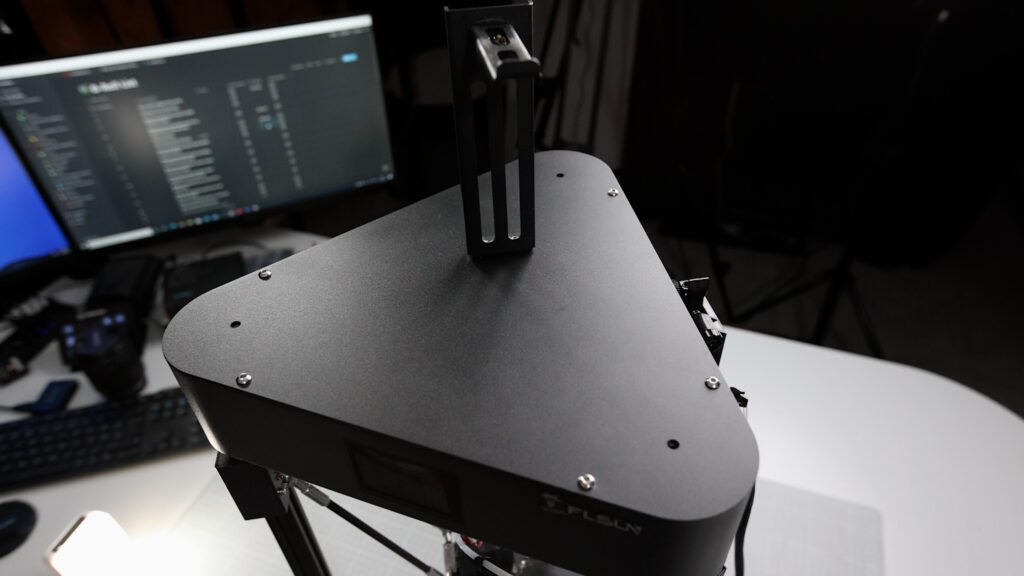
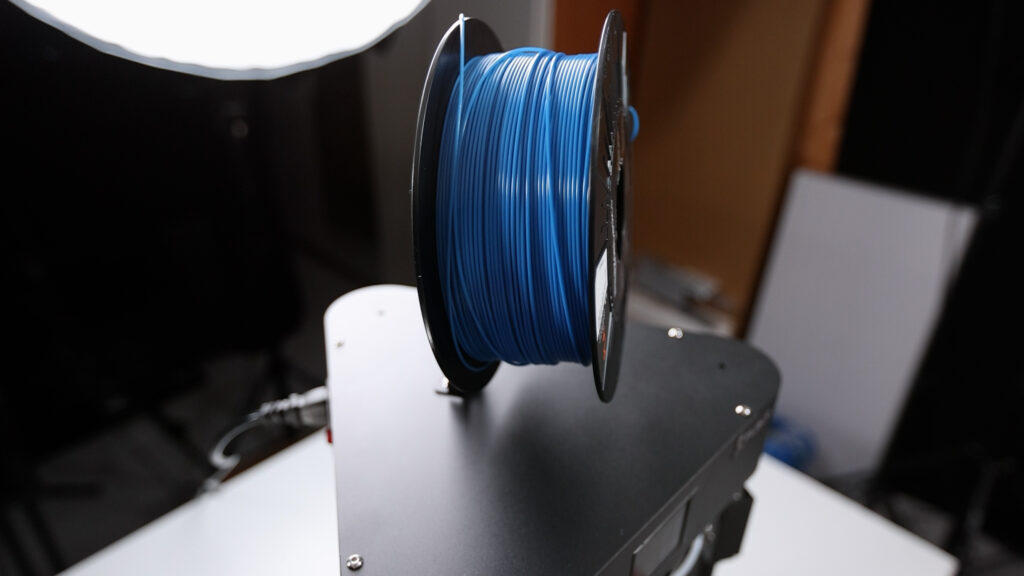
And if you if you put a one kilogram spool on the holder, it's even more top heavy. By the way, this spool holder is really tiny.
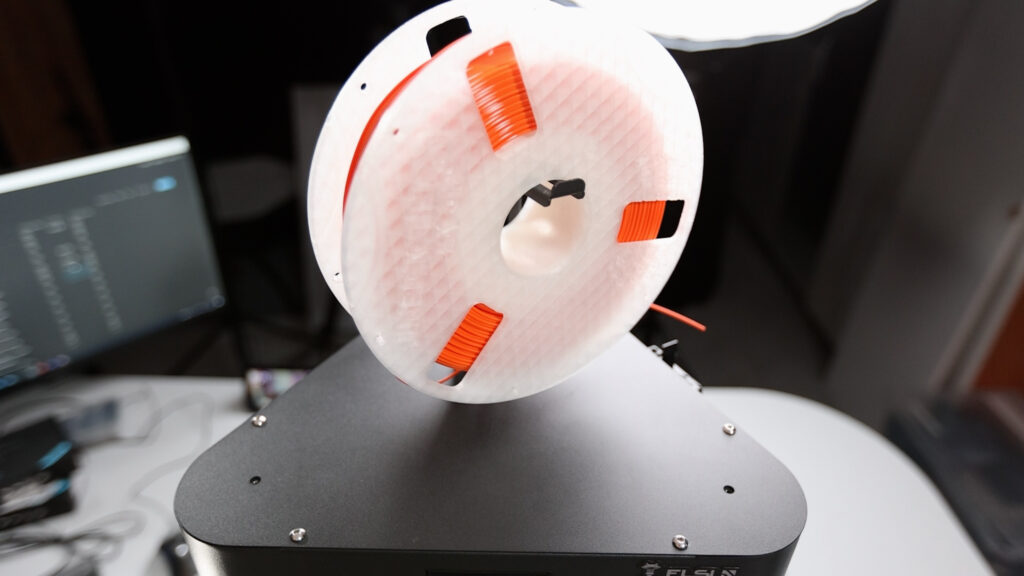
It won't hold any of the wider spools like for example the Amazon Basics spool, that's a bummer, so you should print a larger one - using this printer of course.
Surprisingly being top heave - this didn't cause any issue in the overall results but if you use the touchscreen - and we'll talk about that later - it starts wobbling a bit.
And this cannot be fixed by tightening the screws even further, so better don't push it once you're printing, this might cause quality issues, specially in higher parts.
Another thing with having everything in this top compartment is that the power cable and the cables going down to the heated bed are dangling around a bit but that is how it is - you either like it or not.

A last thing that might have to do with the frame - once you've done the z-leveling using the probe, you should keep the printer set in it's place.
I've noticed that I had to re-do the z-calibration when I started moving the printer around - for example because I wanted another camera angle, or I moved it from the studio to the lab and back.
Just to give you an idea, I did the same with the Ender 3 v2 and I never had to do a new bed leveling, so it seems that this printer is a bit more sensitive in that regard.
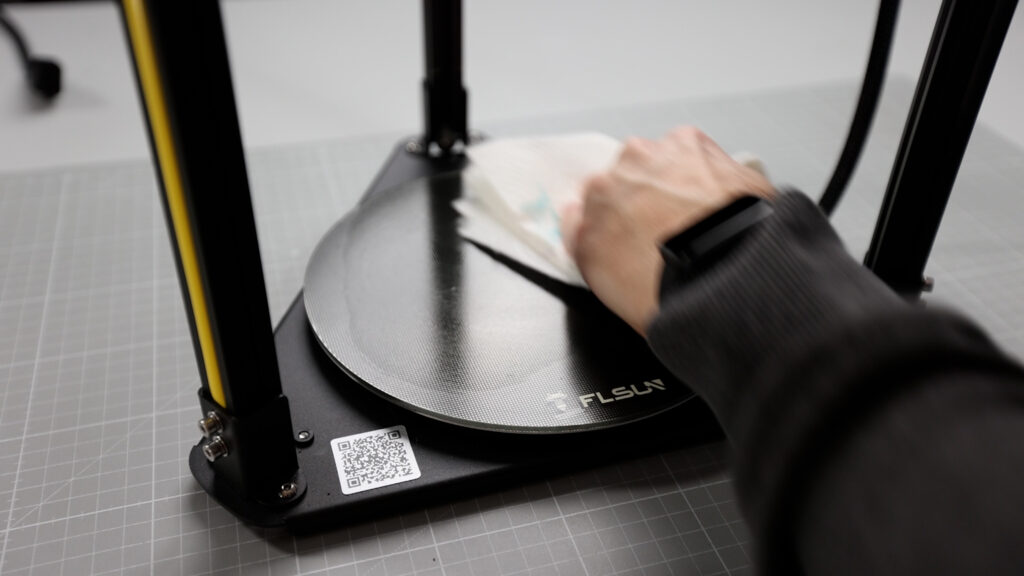
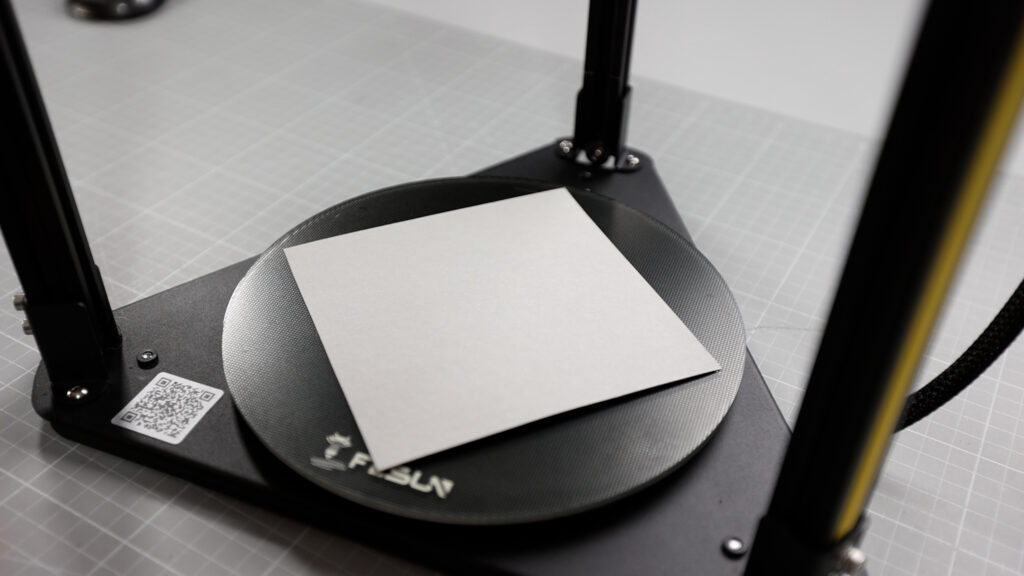
The Printbed
Next let's talk about the print bed and the usable print volume
The heated bed has a glass surface, that's coated with ceramic and that helps a lot to make things stick REALLY well to the surface while printing. Sometimes prints actually stick a little too well to the surface but who would complain about that.
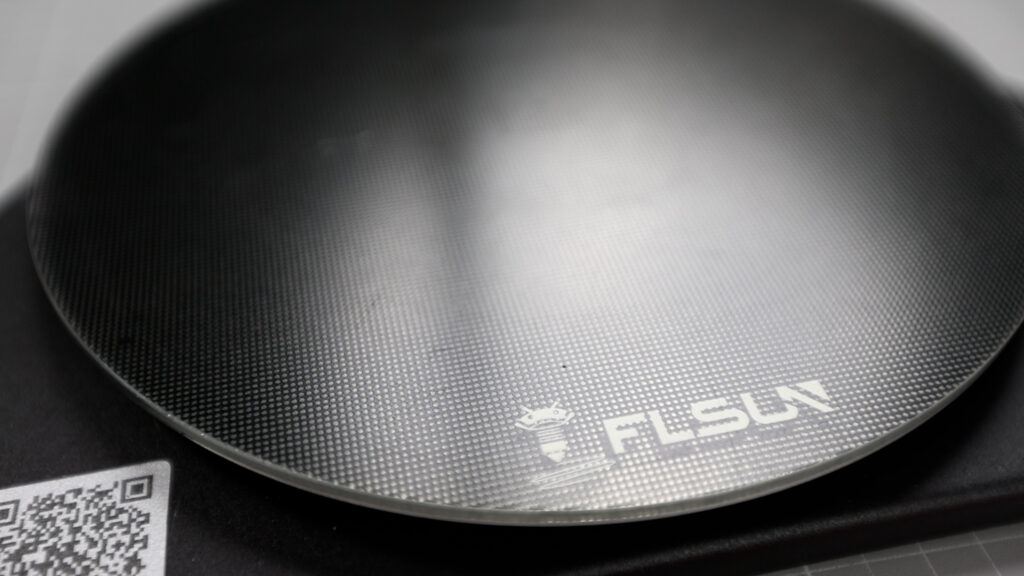
So PLA sticks really well between 50 and 60 degrees celsius surface temperature and the surface can be heated up to 110 degrees celsius.
This would make it suitable for printing ABS but you would probably have to build some kind of enclosure to keep the temperature up because ABS will otherwise warp and probably release from the build plate.
As with every glass plate, it requires cleaning from time to time with isopropanol alcohol even though it might look clean but there is going to be a very thin layer of dirt collecting over time.
The build plate itself is circular and has a diameter of 200 mm but this limits you to 140x140 mm for rectangular parts.
The maximum print height is supposed to be 200 mm - but it's rather 190mm in the upper corners because of the kinematics of this delta system, but you will see this in the test prints.

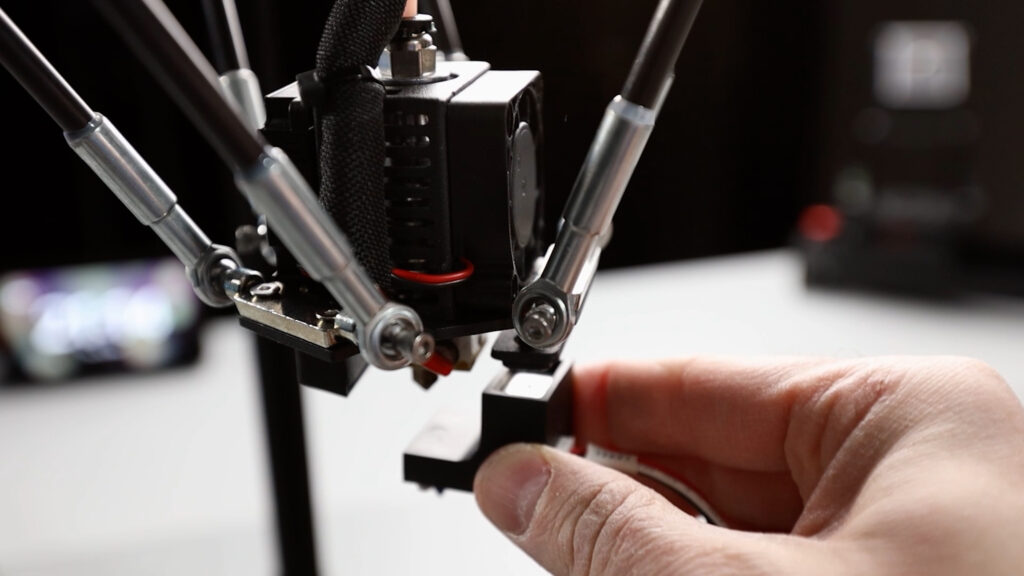
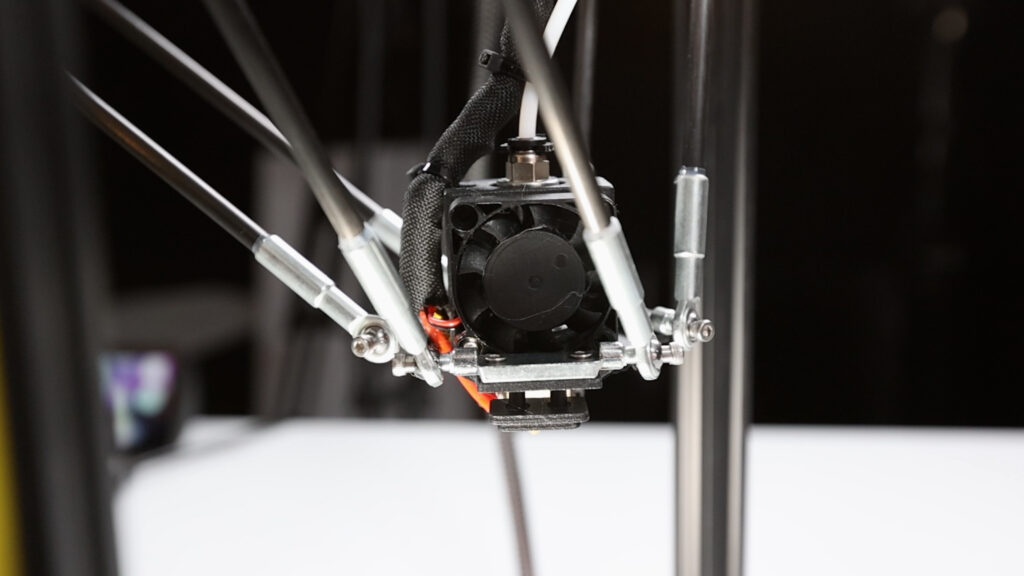
The filament system
The filament system is a bowden style with a titan clone extruder, which works fine with PLA, PETG maybe some stiffer TPU and also ABS.


Still, I got significant underextrusion in some of the test prints.
So I've checked the eSteps calibration using the method I describe in detail in the video linked here.
The results show that eSteps were too low by about 10% so this is definitely an issue that you should tackle to improve print quality.
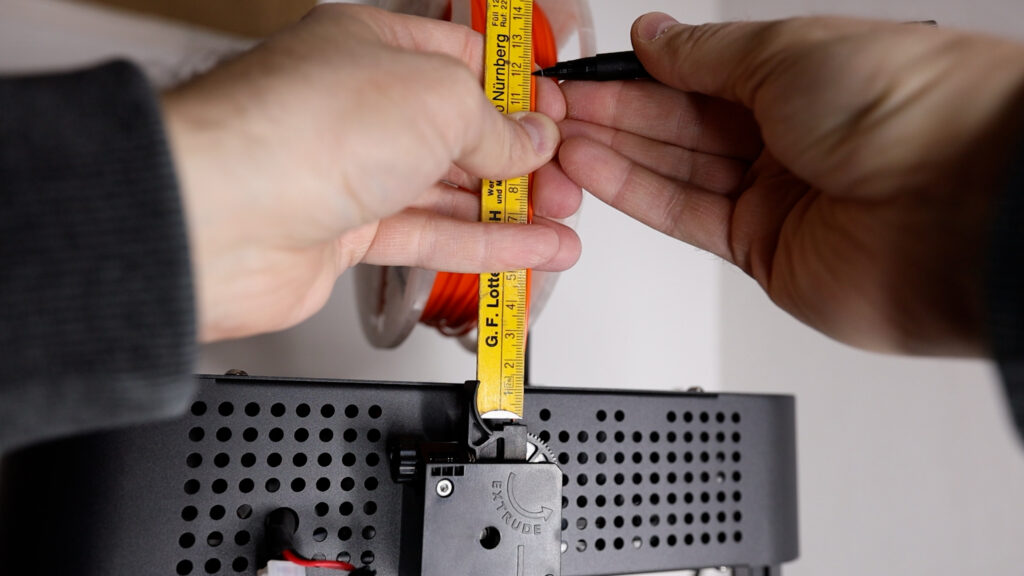
Keep in mind with everything that you're about to see - I did not do the eStep calibration BEFORE my test prints because I wanted to see all the issues before changing anything to be fair.
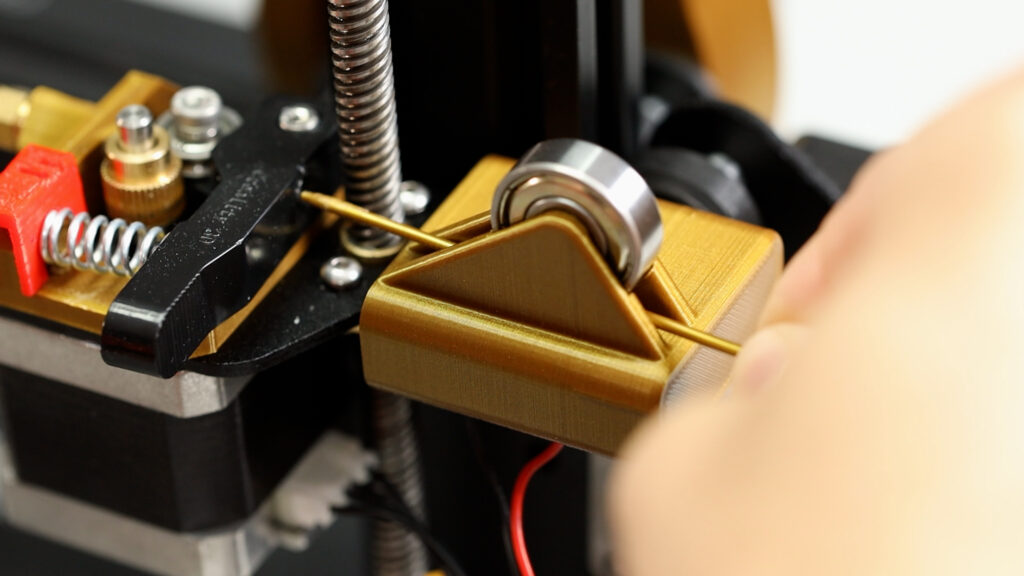
Getting down the first layer with this printer requires you to run the bed leveling process, I've shown that also in my build video.
It's easy to do and the calibration is quite consistent unless you start moving around the printer as I mentioned earlier. In the first test print, I had to tune the final nozzle distance a bit not to squish the filament too much but I got really nice results right from the start.
The mainboard
The electronics are all packed into this upper compartment. If we look inside, we see all the components are nicely accessible, wired up neatly and I had zero issues with the electronics during my test prints, so nothing failed.
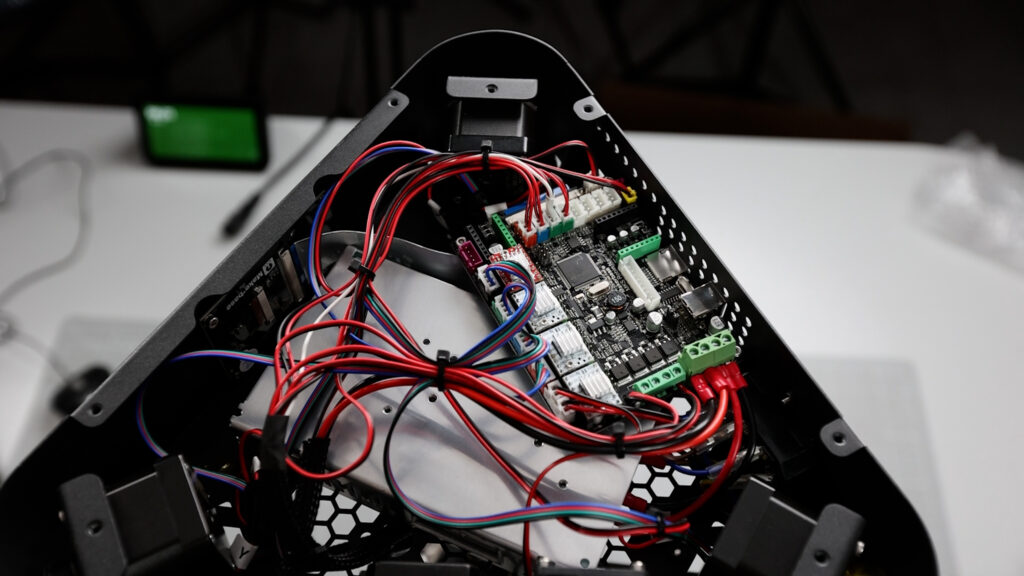
The mainboard model is a 32 bit MKS robin nano 1.2 with a 2.5 inch color touch screen.
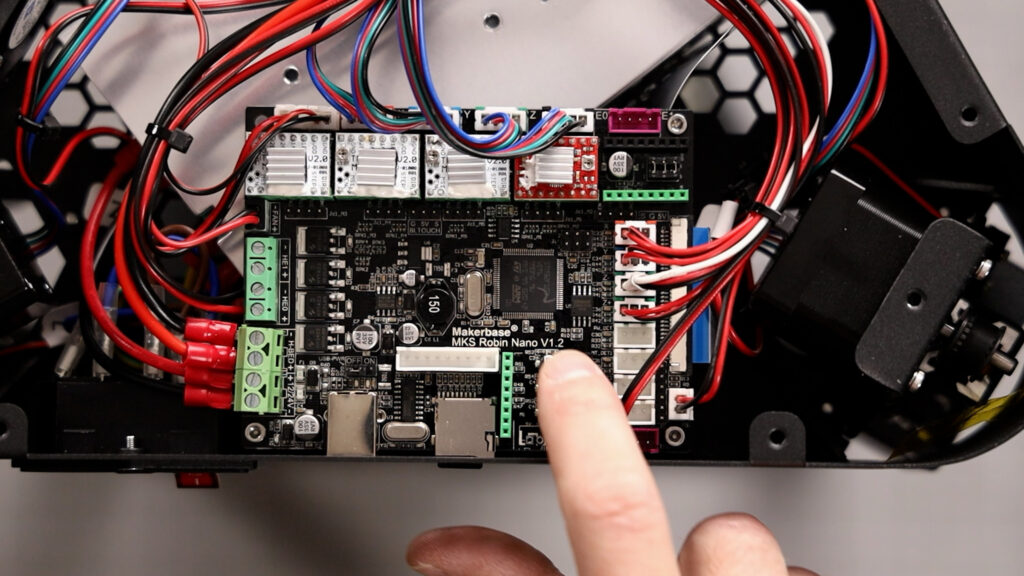
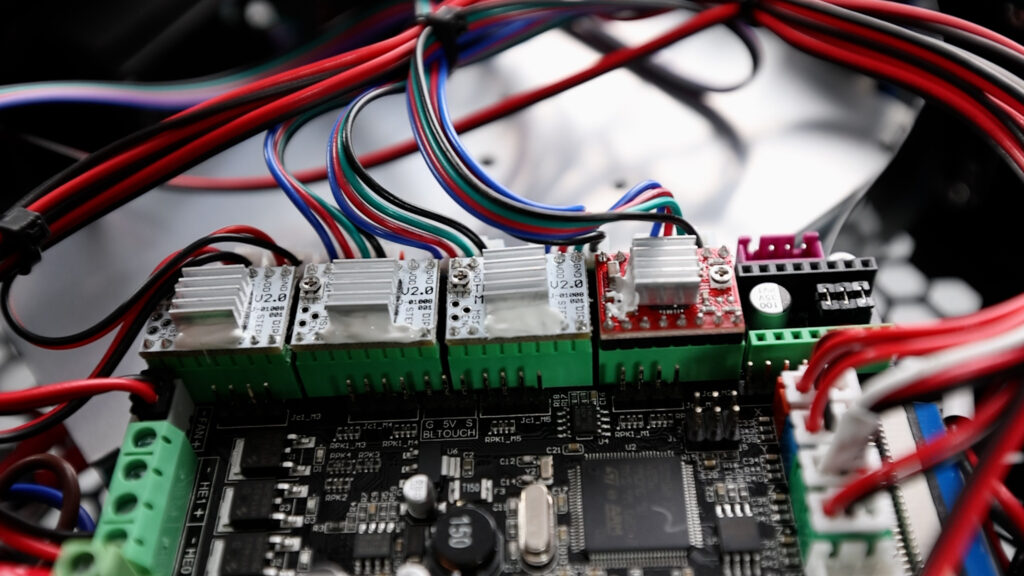
The good thing about this mainboard is that you could swap out the stepper drivers if any of them would be defective.
It seems, that we have TMC2208 silent drivers for the movement motors and for the extruder strangely they chose to use an A4899, so this makes the extruder motor noticeably louder than the other motors.
On this mainboard you could install Marlin firmware or Klipper, there's already people out there who've done and documented this, which I like a lot for future tinkering.
The mainboard has some additional upgrade ports as well, like two filament sensor ports, a second extruder driver slot, so you could upgrade this printer to dual color printing, which sounds awesome.
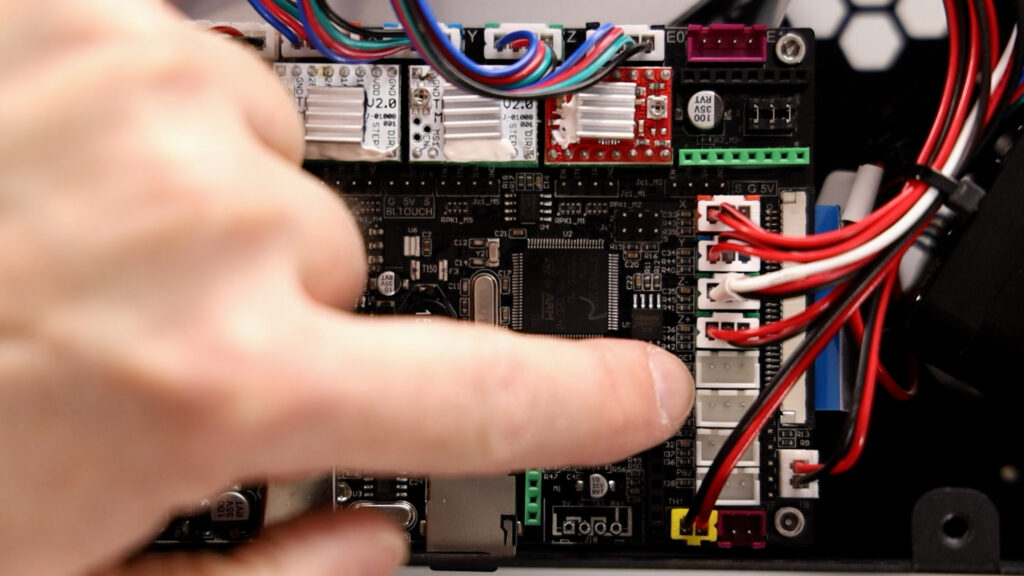
And there is a port for a power loss detection module and another port for a WIFI extension module.
So plenty of upgrade possibilities for the future.
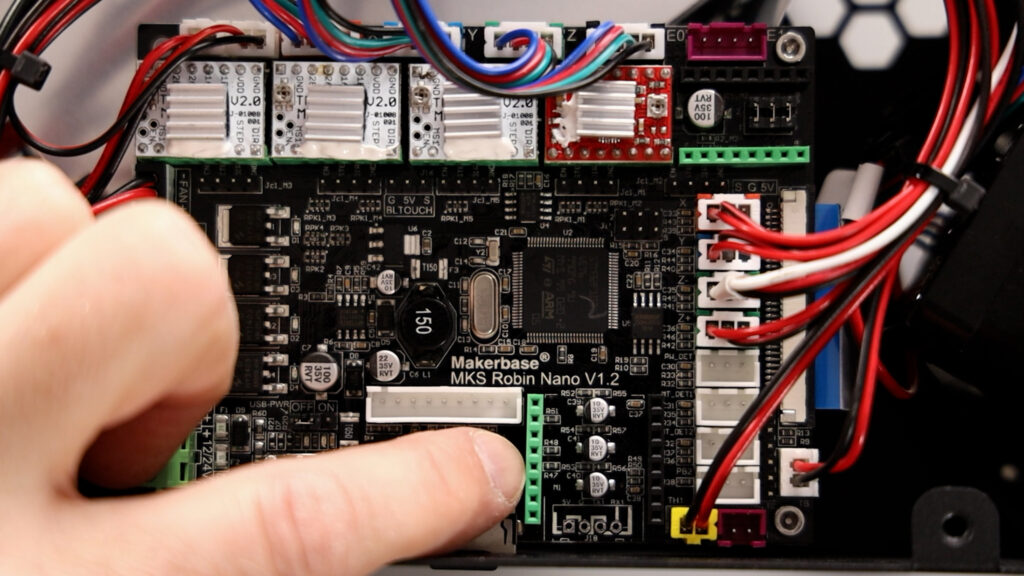
The power supply seems to be of good quality and it's 24V.
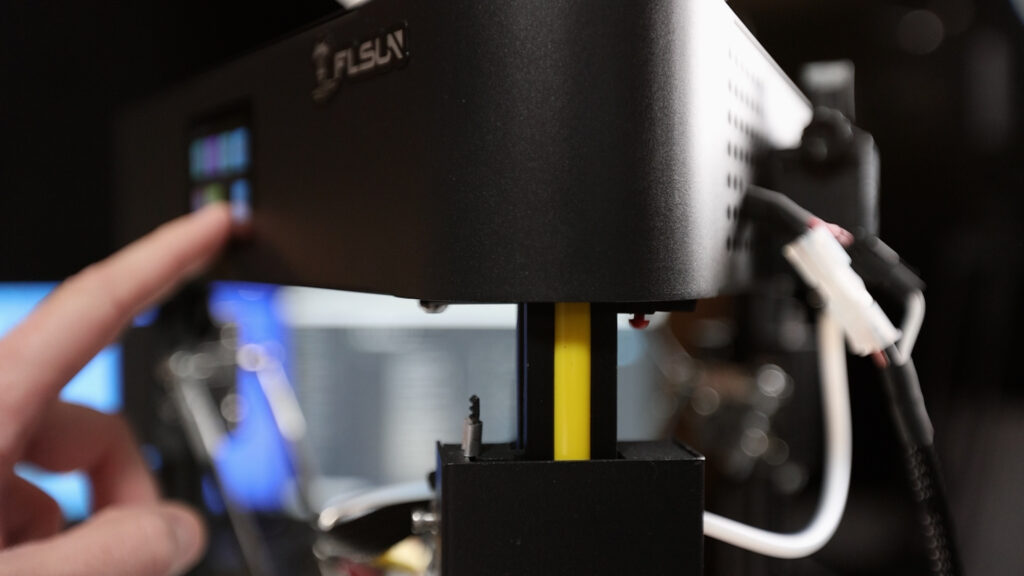
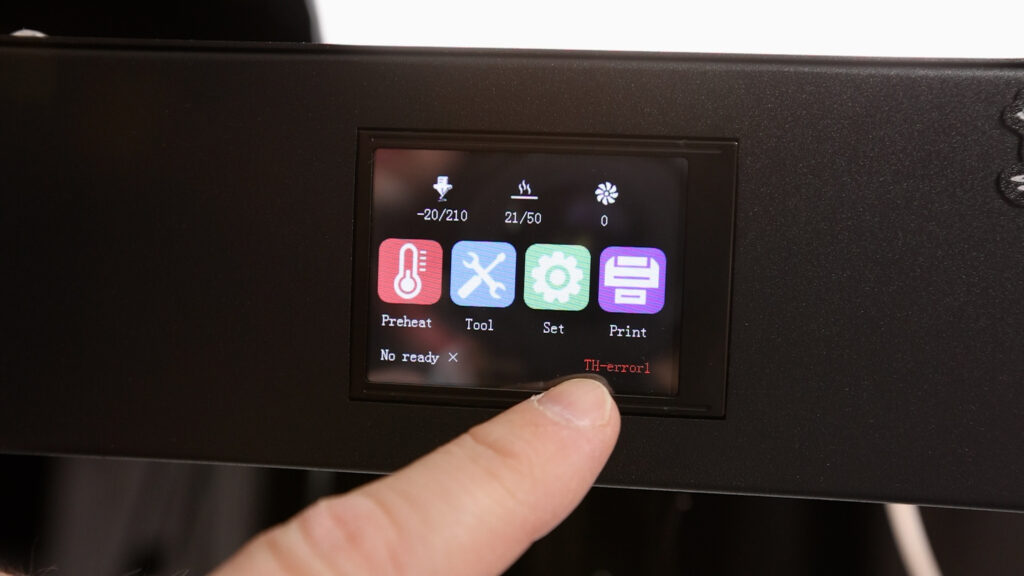
The display
Talking about the display that is connected to this mainboard, it's quite small but does the job.
It reacts quickly to touches and the icon and font sizes are probably ok for most people. The menu system is easy to understand, symbols are clear and mostly intuitive.
It's quite prone to collect fingerprints though.
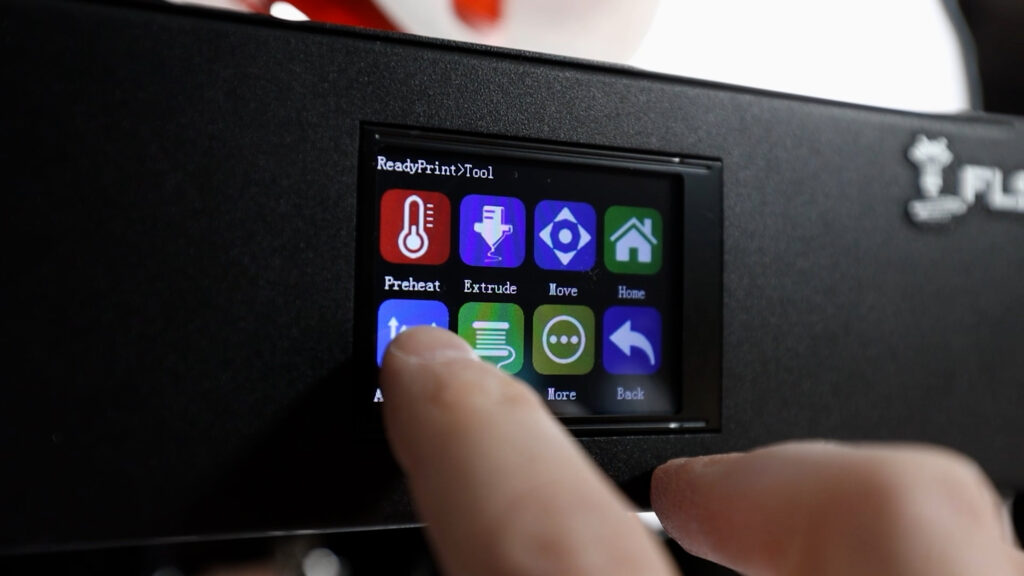
Being at the top of the printer frame with this top heavy design, touching the screen always induces some shakiness into the frame, however.
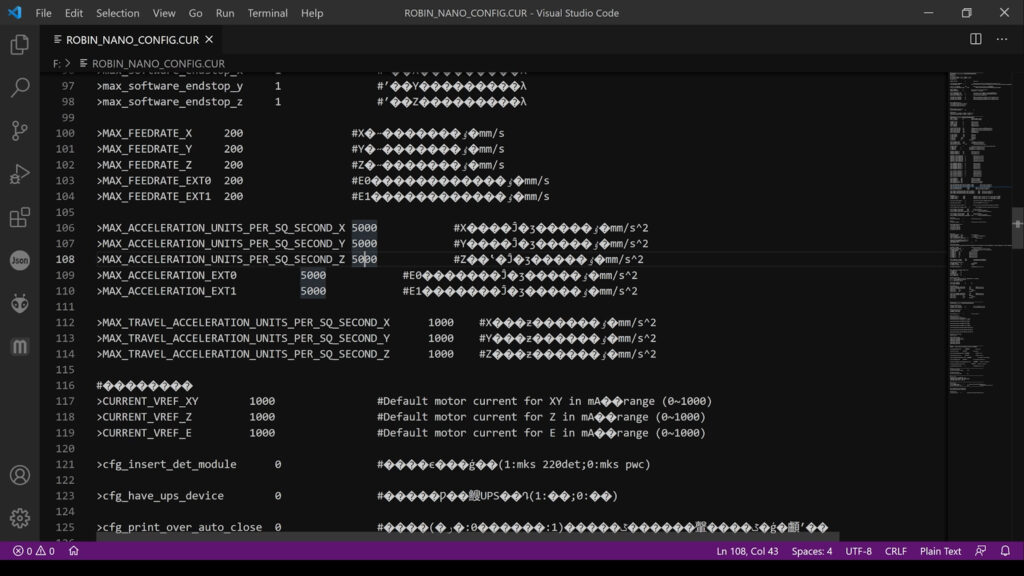
The firmware that runs on the printer is not open source but at least you can configure a bunch of settings using a configuration file that you can edit and put on the sd-card to change things like extruder and axis calibration, acceleration, jerk and more stuff.
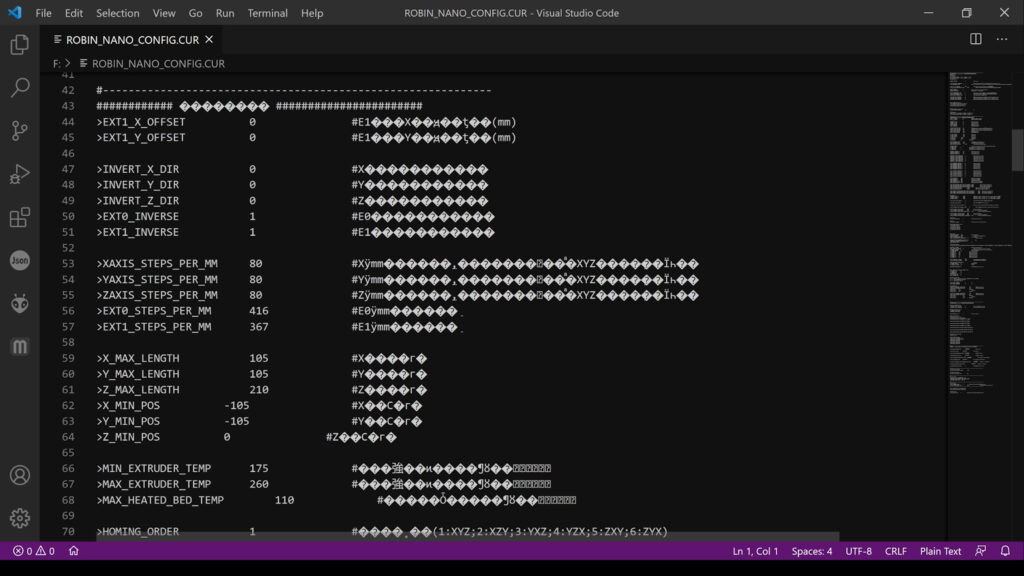
However, there is no linear advance available in the firmware, which is a bummer.
This would be useful to improve print quality and probably will at some point make you want to install Marlin or Klipper to get more control.
The noise
The noise levels on this printer are quite good, except the one fan here at the hotend that is running all the time. If you exchange that one for a high quality fan, it would be actually quite acceptable to run this printer in an office.
Alerts and more features
Some additional things to mention would be:
The printer supports print resuming, so if you lose power, it will offer you to continue when power is back and it also has thermal runaway protection enabled.
Unfortunately, there is no filament sensor coming with the device by default but you can add it quite easily by printing one yourself and using a simple lever switch connected to the filament detection port on the mainboard.
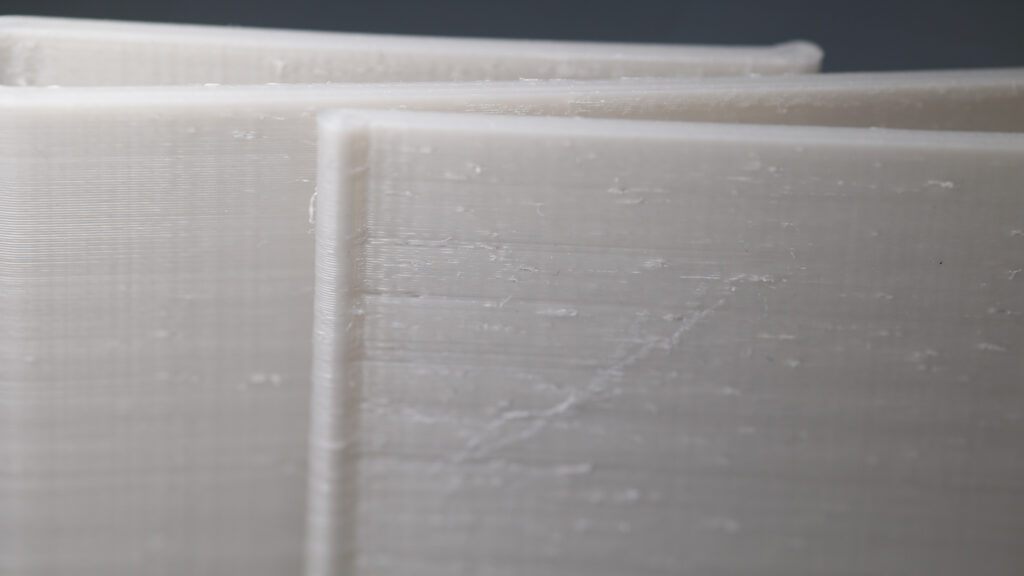
Print quality
Let's talk about print quality
In general, the print quality for all of these prints is quite good - it's not astonishing good however and we'll look at different prints that I've done in the last weeks now to check where the issues are. If you've missed my time lapses video containing all these test prints, go watch that video also, it's just beautiful to see these prints coming to life.
Let's start with the test elephant from the build video. It's really very good quality, all the corners and roundings of this part are without any issues. I don't see any ringing or stringing issues either. It's been printed at 40mm /s.
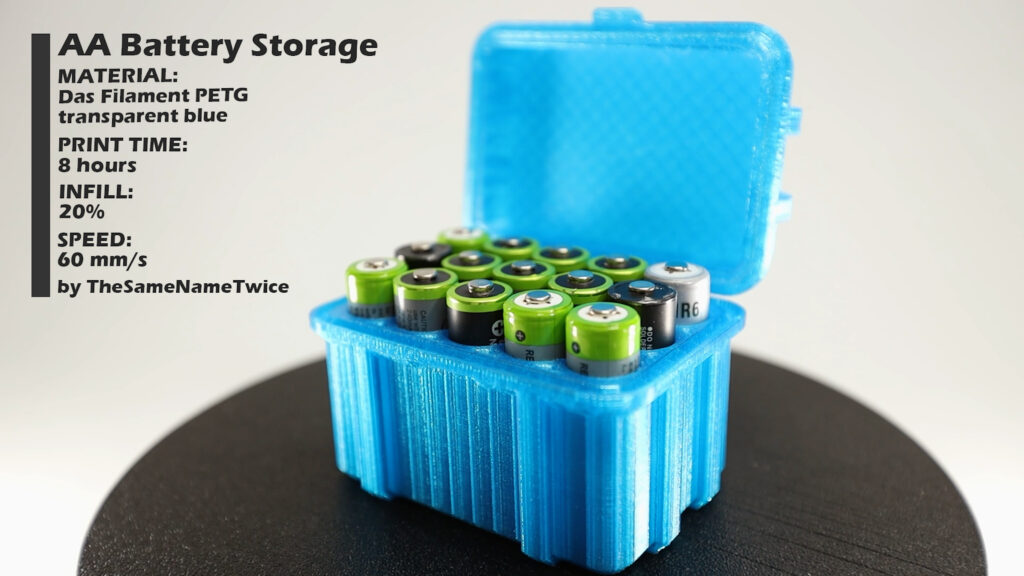
The next one is the Battery storage box, printed in PETG.
Surprisingly, printing PETG did not require any tuning of my settings, I just started printing this with my default PETG profile in CURA and it did come out quite nicely.
Just a few stringing issues in the inner part of the battery slots but that is quite normal for PETG and can be quickly fixed using a heat gun.
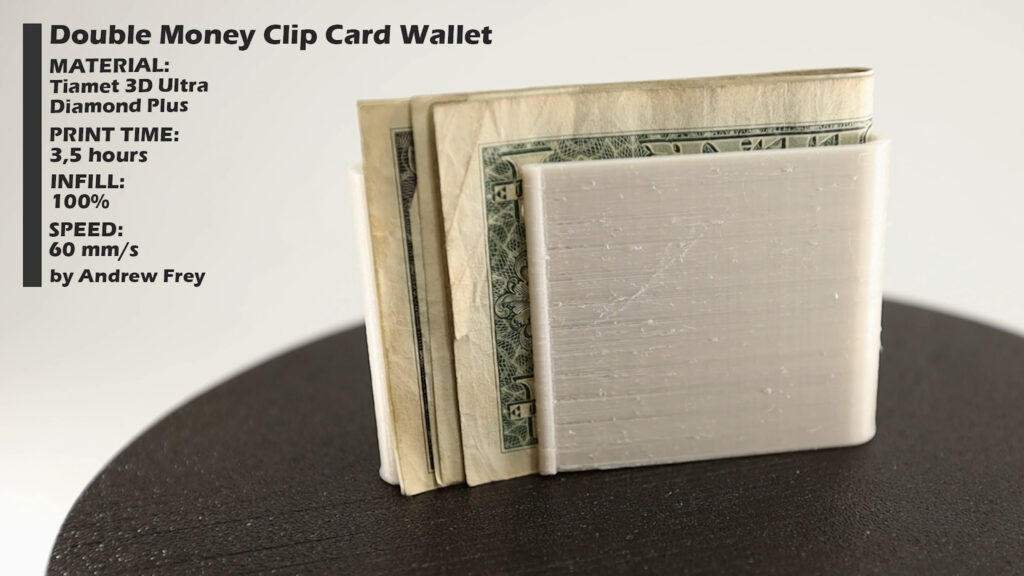
The money clip wallet was the first one where I saw issues with underextrusion and besides the fact that the eSteps were calibrated too low as I mentioned before, the underextrusion also was worse for faster prints than with slower prints.
The book stand on the other hand turned out really well, no signs of underextrusion here although it was printed at 60 mm/s so it might also have to do with the material.
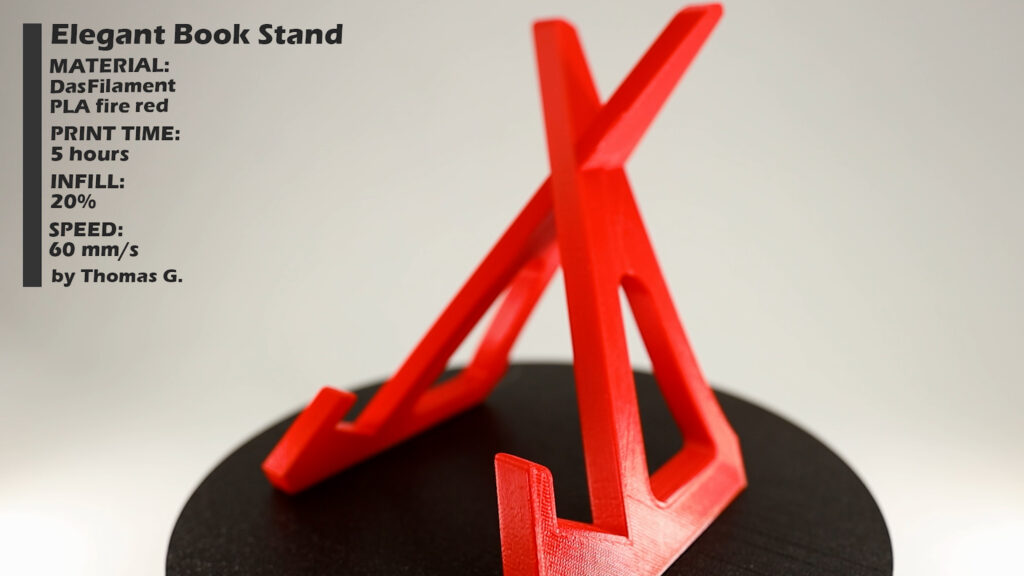
Another issue with this print - it is designed for a printer that has a 200x200 mm print area so I had to downscale it a little bit to fit on this printer.
You will find this becoming an issue with quite a few free designs, because 200x200 is basically the market standard for minimum x and y area and you will have to downsize a lot of the stuff for this printer.
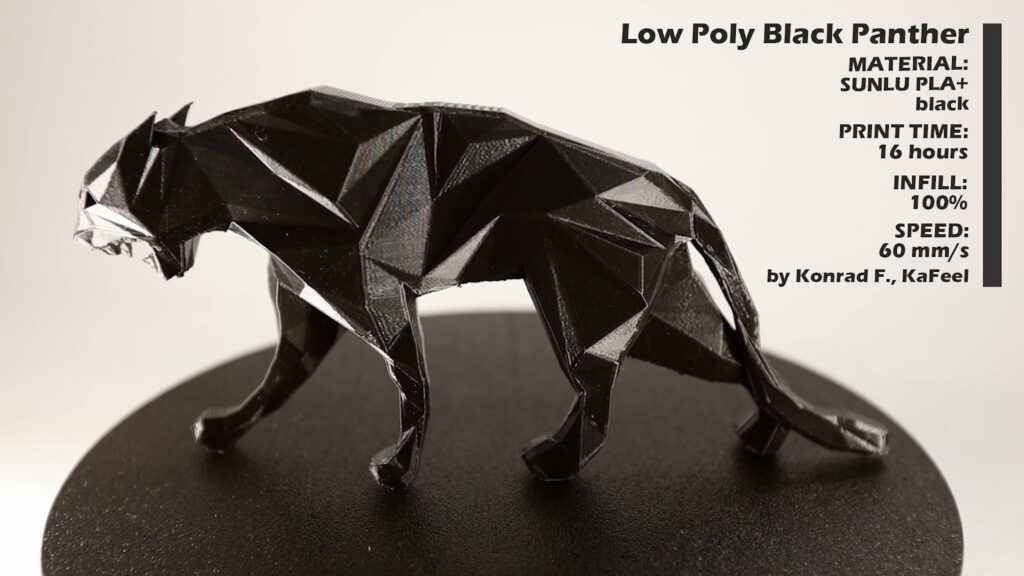
The black panther turned out really nice and shiny, no issues here.
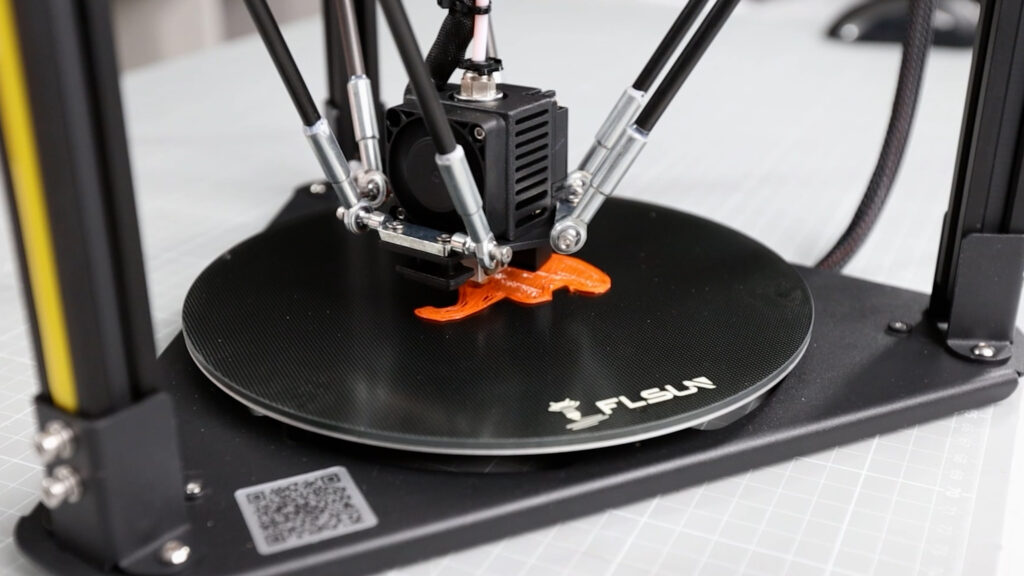
Now, the voronoi dining lamp, this one is a bit trickier. It's printed at 60 mm/s in PLA and there is a few issues.
First, there is all kinds of underextrusion here in the middle of the print, still the structure looks really nice.
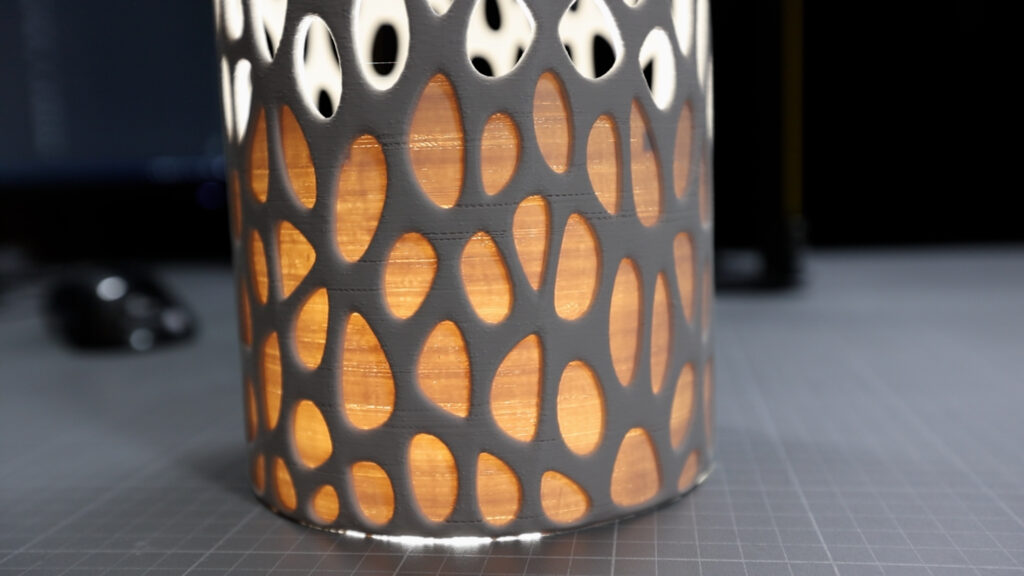
Here at the top we see another problem where it seems like the nozzle detached from the printed part and printed in the air for the last few layers.
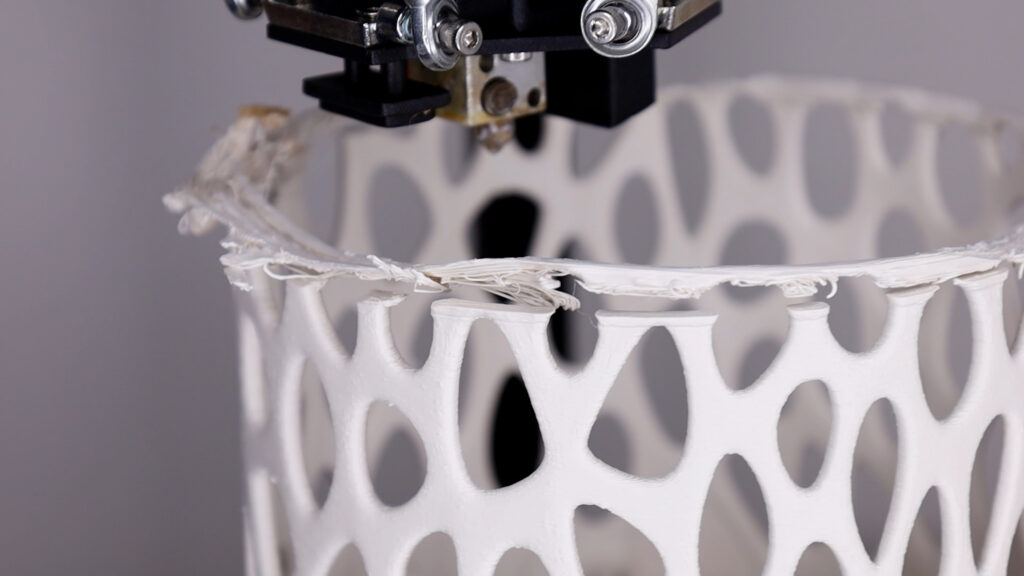
And that's actually what happened because this part is designed to be exactly 200 mm high and 180 mm wide and I mentioned in the beginning that at the top most region of the print area, printing in the edges is only possible up until about 190mm of height.
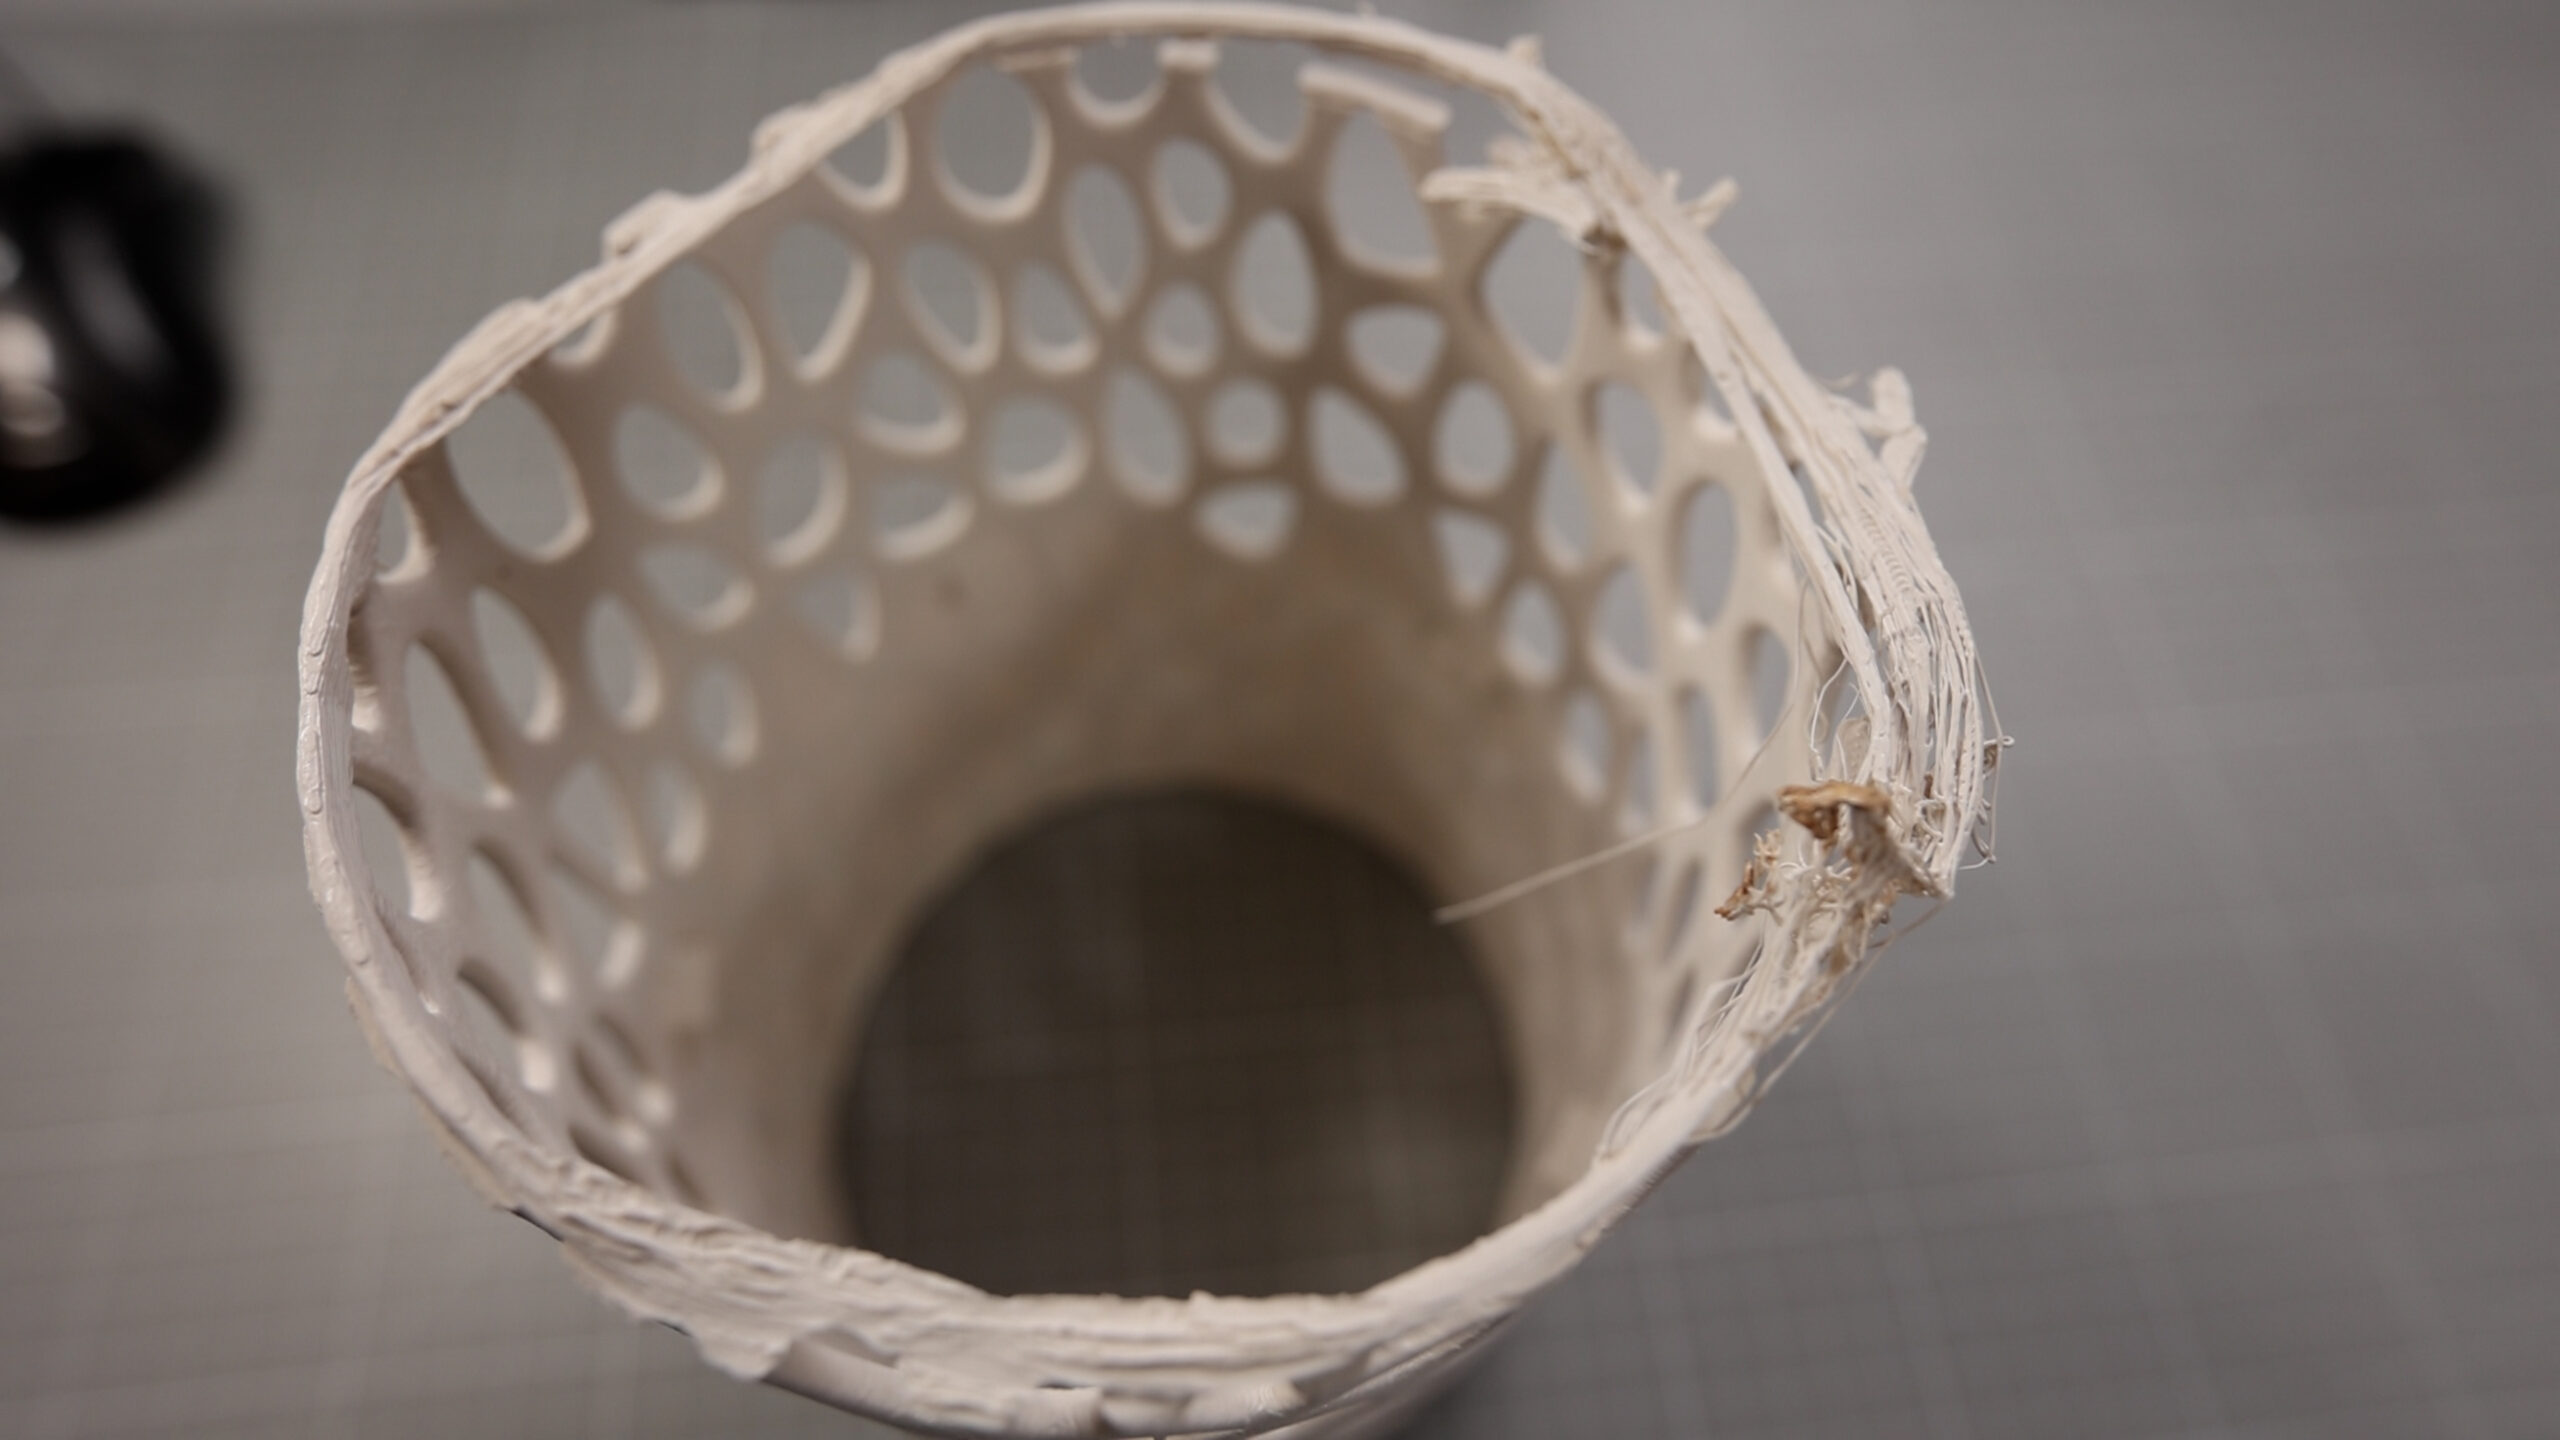

Anything above that will have to be more in the middle of the print area, otherwise you will see this kind of effect.
The Shelf holder set, I printed in the same material as the money clip wallet but at lower speed, at 40 mm/s ant it turned out really nice and without any visual issues. So, underextrusion is a bit more under control at lower speeds it seems.


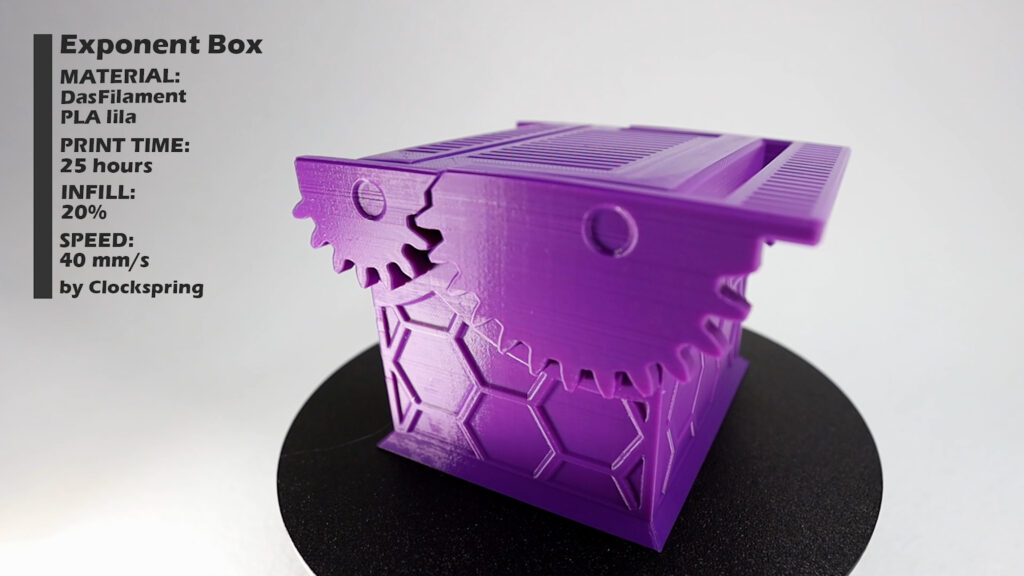
The exponent box, also printed at 40mm/s turned out perfectly and with a really shiny even surface. Also the mechanics move freely, so precision seems not to be an issue with this printer although some people claim that delta printers have issues with printing precision parts.
In general, I can say that there is light and shadow with these results. Print speed should be around 40 mm/s for really good results. You may go higher but this will induce some issues as you've seen.
Another problem that is caused by the mainboard, most probably by the firmware and maybe also by the fact that the CPU on the mainboard isn't the fastest - is - if you use the menu while printing, the printer will show stuttering, it might even stop for a moment to render the display.

And that shows me that this mainboard is really at the edge of its capabilities to run this printer.
So probably another firmware might help here or changing the mainboard for a faster one like the SKR Turbo or the Duet 3 maybe.
FLSUN Q5 vs. Ender 3 v2
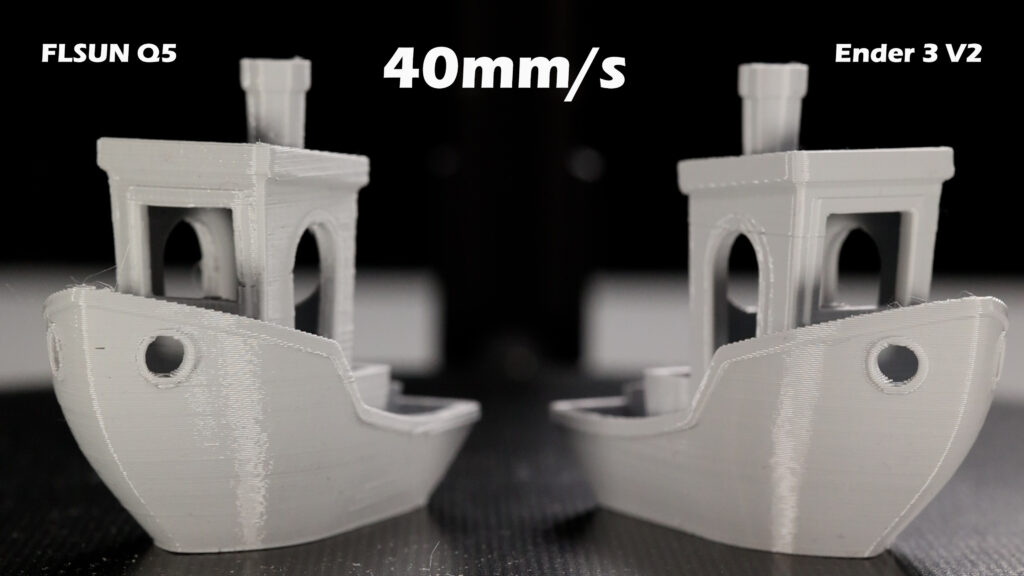
Let's see how print speed really influences quality and how fast this printer is printing compared to the Ender 3 v2 for the same part at the same speeds.
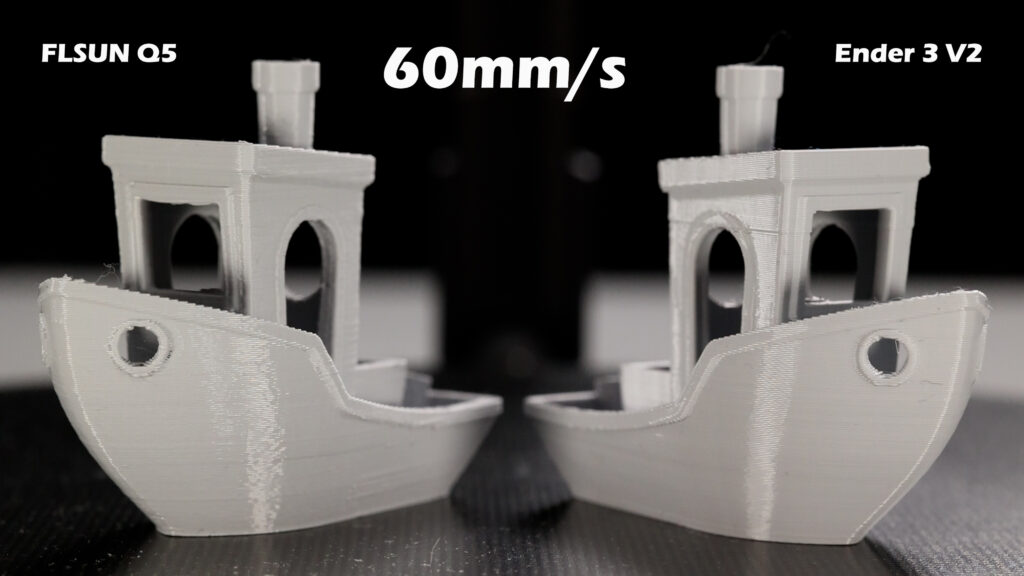
I've printed several Benchys at different speeds and to keep it short, printing the Benchy with the factory settings at 40 mm/s takes 1 hour 28 minutes and on the Ender 3 v2 it takes 2 hours 21 minutes. So this shows, printing is faster with a delta printer and even if you set the print speed to 90 mm/s on the Ender 3 v2, the Benchy still takes 1 hour 38 minutes, whereas the Q5 will go down to about one hour and 6 minutes and this is with default settings on both printers (B54).

Print quality of course is affected by higher speeds.
These are the side by side Benchys
at 40 mm/s
at 60 mm/s
and 90 mm/s.
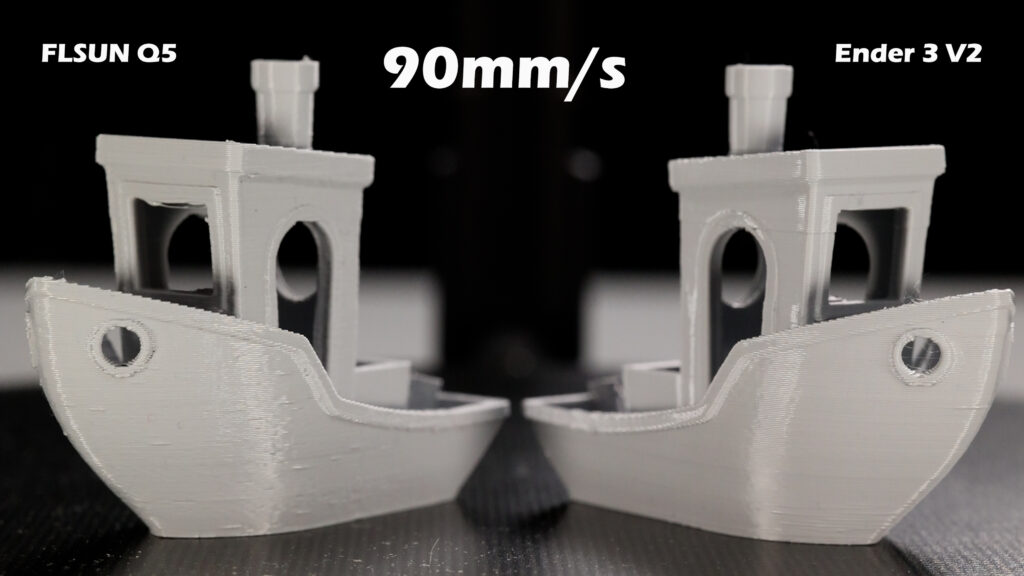
And you can clearly see that the Ender 3 v2 visually looks a lot cleaner at every speed whereas the Q5 even at the lowest speed never reaches the same level of quality.
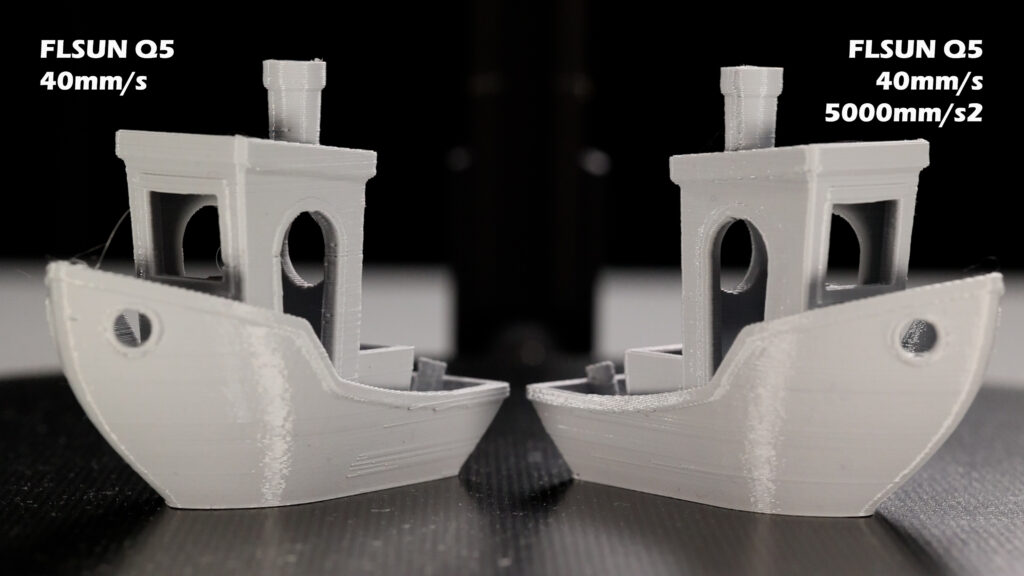
You can tweak the Q5 to print even faster by setting the acceleration value in the firmware to something like 5000 mm/s² and this will make prints even faster but also degrade quality a bit especially at higher speeds.
So my sweet spot will be using the higher acceleration of 5000 mm/s² at 40mm/s print speed, which results in this Benchy being printed in 1 hour 24 minutes.
Final thoughts
My final thoughts on this printer - it's a really good printer for the price, no doubt about it.
If you're a beginner, you'll be happy with the quality and how easy it is to get started and get prints done.
And it's really fast. Some people are really most frustrated that 3D printing is so slow and this could be one good reason to get this printer.
Of course unless you don't need a bigger print volume.
If you need more volume and also better overall print quality, look for printers like the Ender 3 v2.
The basic frame, probably can be a good base for upgrading it later to a more capable mainboard like the duet wifi or any board that has more compute power.
It also has lots of potential for future upgrades like dual color printing and filament sensors.
So get this printer, if you are tired of waiting for prints, if you don't need the best print quality out there and if you're on a budget.
🛒 Get the FlSun Q5 here: https://geni.us/flsunq5
If you liked this content, please consider supporting my work by becoming a Patron so I can continue making this available to you for free: https://www.patreon.com/crosslink.
THE PRINTERS I USE: https://kit.co/danielcrosslink/the-3d-printers-i-use
MY MERCH: https://www.crosslink.io/shop
BECOME A PATRON: https://www.patreon.com/crosslink
CHAT ON DISCORD: https://discord.gg/ne3J4Rf
BUSINESS INQUIRIES ONLY (OR IF YOU WANT TO SEND SOMETHING) - DANIEL@CROSSLINK.IO
FOLLOW ME:
INSTAGRAM - https://instagram.com/danielcrosslink
TWITTER - https://twitter.com/danielcrosslink
FACEBOOK - https://facebook.com/danielcrosslink
WEBSITE: https://www.crosslink.io
The Music I use: https://www.crosslink.io/es, AMAZING for YouTubers!
GEAR USED
https://kit.co/danielcrosslink/my-video-gear
Disclaimer: As an Amazon Associate I earn from qualifying purchases.